

For most Chinook trolling, start with a downrigger, an 11" flasher, and a cut-plug herring. That’s your deep, bottom-oriented workhorse. Run 8 to 16 ounces depending on depth, and keep the boat between 1.8 and 3.0 mph. That single combo puts more kings in the box than any other setup on the West Coast, but it’s not the only tool worth carrying.
Two more rigs round out a fishable spread. A weighted slider, or cannonball slider, paired with a flasher and herring gives you versatility in bays and river mouths where bottom contact is everything. A diver or planer rig running a spoon or hoochie earns its spot when you need depth without stacking on heavy lead, or when you’re working structure and steep drop-offs where a straight cannonball would hang up.
Chinook Trolling Rig Quick-Pick
- Downrigger + 11" flasher + cut-plug herring: Deep, bottom-hugging kings. Best on incoming or outgoing tide. Run trolling speeds suitable for Chinook salmon.
- Cannonball slider + flasher + herring: Bays and river mouths. Run moderate trolling speeds and adjust weight based on current.
- Diver/planer + spoon or hoochie: Structure, steep drops, or when you want depth minus the lead. Run slightly higher trolling speeds depending on lure type.
Before any of that hits the water, pack three non-negotiables: a line-counter reel, 30 to 65 lb main line in braid or mono depending on your setup, and a stack of pre-tied leaders so a bite window never gets wasted retying knots.
Key Takeaways
The most reliable Chinook trolling setup pairs an 11" flasher with a cut-plug herring behind a downrigger, run 8 to 16 ounces deep and 1.8 to 3.0 mph.
| Point | Details |
|---|---|
| Pick the right base rig | Downrigger + 11" flasher for depth, cannonball slider for bays, diver for structure and weeds. |
| Match weight to depth | Use 6–8 oz shallow, 8–12 oz mid-depth, 12–16+ oz deep or in heavy current. |
| Dial in leader lengths | Run tail leader lengths appropriate for the type of lure or bait used. |
| Fix problems one variable at a time | Adjust flasher size, speed, or depth individually before changing spots. |
| Stock terminal tackle from Highclasstackleco | Pre-tied leaders, crimps, and snaps from Highclasstackleco’s terminal tackle keep quick-changes fast and reliable. |
Table of Contents
- Detailed Chinook Trolling Setup Templates You Can Copy
- Weights and Depth Control: Reading the Water Right
- Flasher Sizes and Leader Lengths for Chinook
- Terminal Tackle and Hook Sizing for Chinook Bait
- Trolling Speeds and Managing a Multi-Rod Spread
- Step-by-Step Chinook Rig Setup and Quick-Change Routine
- Fixing the Most Common Chinook Trolling Problems
- Field Notes From Building Chinook Rigs on the Water
- What the Data Actually Tells Us About Chinook Rigs
- Build Your Chinook Spread With Highclasstackleco
- Frequently Asked Questions About Chinook Trolling Rigs
- Sources
Detailed Chinook Trolling Setup Templates You Can Copy
Rig recipes only work if the sequence is right and the leader lengths match what the fish are actually seeing. Here’s the breakdown for each of the three core setups, built from proven rigging sequences used across Chinook fisheries.
1. Downrigger flasher + cut-plug herring rig. Clip your release to the downrigger ball, run your main line to the release, then tie a 6 to 10 foot fluorocarbon leader using an FG knot for the braid-to-fluoro connection. That leader runs to your flasher, and behind the flasher you run a 22 to 28 inch tail leader straight to the cut-plug herring. Hook size depends on herring size, but this combo is the standard Chinook rig spec for a reason: it puts consistent, controlled action on bait without over-spinning it.
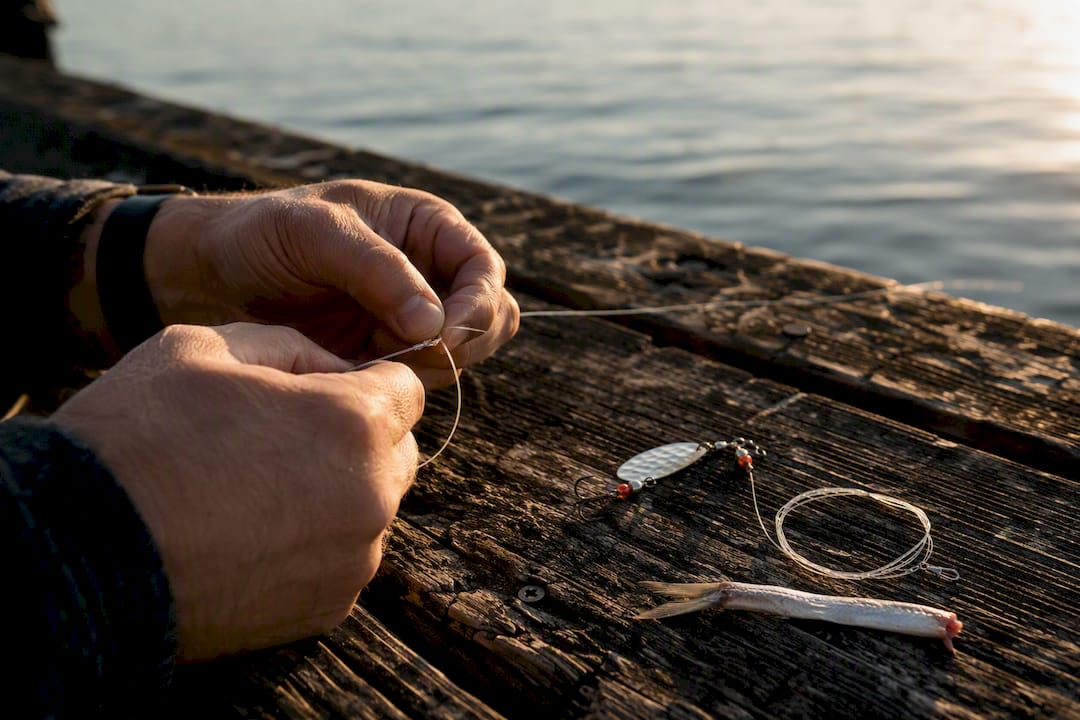
2. Cannonball slider rig. Instead of clipping directly to a downrigger, you’re running a slider on the main line ahead of a bumper (a short length of heavy mono or fluoro, typically 12 to 18 inches) that keeps the weight from crashing into your flasher. Keep the bumper short to reduce tangles; shortening it is often the fastest fix on the water.
3. Diver/planer rig. Here you’re not using a cannonball at all. Attach your diver directly to the main line, set it to the appropriate dive angle, and run a suitable length leader to a spoon or hoochie. Divers dig depth on their own, so leader length matters more here than weight math.
Alternate short rigs worth carrying:
- Naked herring, no flasher, fished shallow in clear water on rear rods.
- Fly and dodger combo for finicky, structure-oriented fish.
- Straight spoon behind a diver with no attractor at all, useful in stained water where flash spooks more than it draws.
Pro Tip: Pre-tie your leaders at the kitchen table, not on the boat. Label each one by length with a piece of tape on the spool. When a rod goes off and you need to swap in 60 seconds, digging through a tangle of unmarked leader is how you lose the bite window entirely.
Knot cheat-sheet: use the FG knot for every braid-to-fluoro connection, a Palomar knot for attaching hooks, and an improved clinch for swivel connections on mono setups. Pre-tie anything that involves the FG knot at home, since it’s fussier to tie with cold, wet hands. Save simple clinch knots and hook swaps for on-the-water quick changes.
Weights and Depth Control: Reading the Water Right
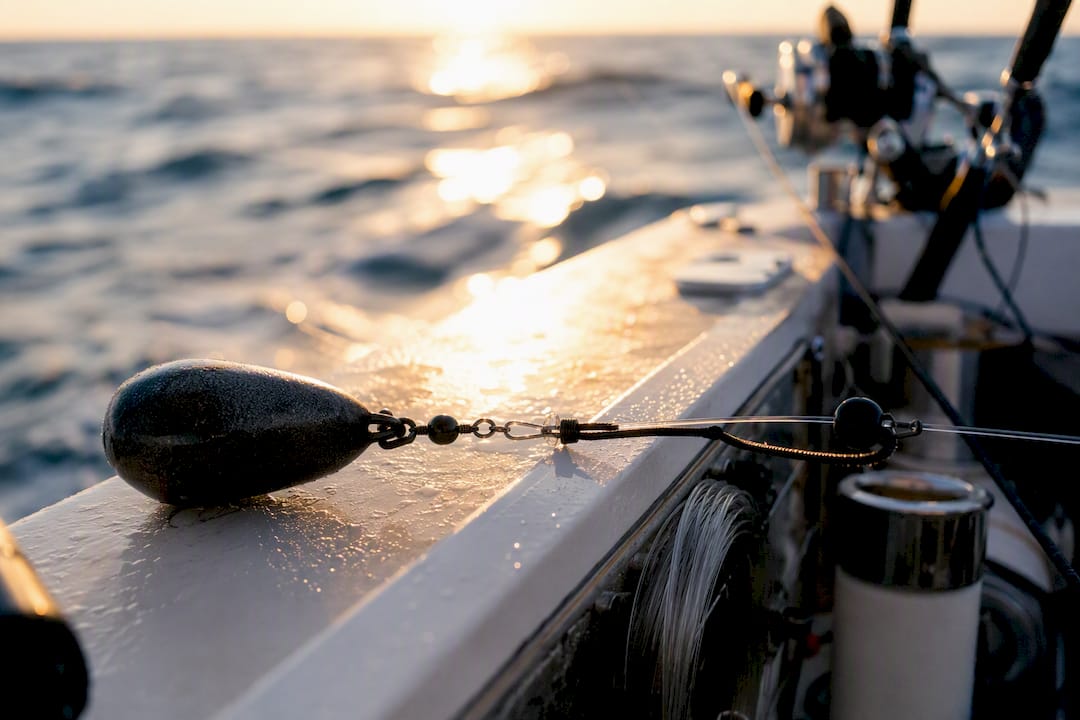
Weight selection comes down to two variables: depth and current. In water under 20 feet, 6 to 8 ounces usually keeps you in the zone without dragging bottom every pass. From 20 to 40 feet, step up to 8 to 12 ounces. Anything deeper, or any water pushing hard current, calls for 12 to 16 ounces or more, and many experienced Columbia River anglers add another 4 to 6 ounces on top of that when the tide is really moving.
- Under 20 ft: 6–8 oz
- 20–40 ft: 8–12 oz
- 40+ ft or heavy current: 12–16+ oz, add 4–6 oz in strong tide
Line counters and sonar work as a pair, not separately. Let your weight down until you feel or see it hit bottom on the counter, then crank up one turn of the reel handle. That one crank keeps your bait just off bottom instead of dragging through rocks and snags. From there, scope is your adjustment tool. Scope is the relationship between how much line you’ve let out, your weight size, and your trolling speed, and it determines the actual angle your gear rides at behind the boat. Faster speeds and lighter weights mean less scope and a shallower running depth for the same amount of line out. When the bottom contour changes, and it will, adjust your line-out rather than your speed. Speed changes affect your whole spread; letting out or reeling in line only affects the rod you’re adjusting.
Switch from a cannonball to a diver when you’re working weedy flats or rocky structure where a dragging weight means constant snags and lost gear. Divers dig their own depth, so you’ll typically run less total weight on the line while still hitting the same strike zone.
Flasher Sizes and Leader Lengths for Chinook
Flasher size isn’t a style choice. It’s a depth and clarity decision that changes how far a Chinook can see your bait and how much action gets transferred down the line.
- 8" flashers: Shallow water, rivers, or when targeting coho alongside kings. Less flash means less spook in tight quarters.
- 11" flashers: The standard choice for open-water Chinook trolling. This is your default unless conditions push you elsewhere.
- 14" and 360-degree flashers: Big open water, deep trolling, or when you need maximum attraction radius to pull fish from a distance.
Tail-leader length changes by lure. Herring wants 24 to 36 inches behind the flasher. Spoons need more room to swim properly, so run 30 to 42 inches. Plugs need the most separation at 48 to 60 inches to avoid fouling on the flasher’s rotation. Hoochies sit in the middle at 30 to 36 inches.
Color choice matters more in clear water than stained water. Chrome and green work as reliable, low-risk choices in most Pacific Northwest conditions, while chartreuse and purple tend to earn their reputation in off-color water where more contrast helps fish find the bait. If your leader keeps tangling around the flasher, the fix is almost always leader length. Shorten it by two to four inches before you blame the knot.
Terminal Tackle and Hook Sizing for Chinook Bait
Hook sizing follows herring size, and getting it wrong is one of the fastest ways to miss hookups on a good bite.
- 3/0 to 4/0 hooks for standard red-label herring, the most common bait size for Chinook trolling.
- 5/0 hooks for large green-label herring, giving you the gap needed for a bigger bait profile.
- Two hooks for most cut-plug setups; add a third trailing hook only when short strikes are a persistent problem.
Cut-plug technique differs slightly between coho and king slots. For Chinook, cut a slightly steeper angle to get a wider, slower roll that matches the more deliberate takes kings tend to give compared to aggressive coho. Run your top hook through the cavity near the cut, and your trailing hook through the ribs, which keeps the bait rolling true instead of spinning flat.
For leader material, 25 to 30 lb fluorocarbon handles tail leaders well, while 15 to 25 lb fluoro works fine for short bumpers where less visibility matters more than raw strength.
Always check your local regulations on hook counts and barbless requirements before you rig up. Rules shift by waterway and season, and it’s the one detail worth confirming every single trip.
Trolling Speeds and Managing a Multi-Rod Spread
Speed dictates presentation more than almost any other variable in Chinook trolling. Slow, lazy kings holding deep in pre-spawn mode respond best to 1.5 to 2.2 mph. Standard Chinook trolling with flasher and bait setups runs 2.2 to 3.0 mph. Push past 3.0 mph when you’re pulling spoons or targeting active coho alongside kings.
- 2-rod spread: One shallow, one deep, staggered by at least 20 feet of line-out to avoid crossing on turns.
- 4-rod spread: Stagger weights so no two rods run the exact same depth, spacing riggers wide.
- 6-rod spread: Requires disciplined weight staggering (differ each rod by at least 2 to 4 ounces) and clear crew roles to avoid chaos during a double.
Pro Tip: Assign roles before the first rod goes down, not after. One person nets, one person clears the other lines, and one person handles the hooked fish. Multiple Chinook hitting at once is exactly when a spread turns into a birds’ nest if nobody knows their job.
When you mark fish stacked tight on the sonar, tighten your spread and slow down slightly to keep more baits in the strike zone longer. When the tide changes and fish scatter, widen back out and cover more water.
Step-by-Step Chinook Rig Setup and Quick-Change Routine
Bring 6 to 8 pre-tied leaders per rod, spooled or looped on foam holders and labeled by length with a permanent marker. This alone saves more fishing time than any other prep step.
- Check leader labels and confirm you have your full mix of herring, spoon, and hoochie leaders ready before leaving the dock.
- When a bait blows out or a fish steals it, reel the rod in immediately rather than waiting.
- Unclip the fouled leader using a duolock snap for instant release.
- Clip on a fresh pre-tied leader using the same snap connection.
- Attach the bait or lure, checking hook placement in three seconds or less.
- Drop the rod back to its marked depth using your line counter reading from before.
That whole sequence should take under 60 seconds with practice. Bead-chain swivels at your flasher connection make hardware swaps even faster since they spin freely and resist twist buildup between changes.
Fixing the Most Common Chinook Trolling Problems
Every angler runs into the same handful of headaches. Here’s how to solve them fast instead of guessing.
- Blown-out bait: Slow your speed, shorten the tail leader by a few inches, or reduce flasher size to cut down on excess action tearing the bait apart.
- Constant tangles: Trim your bumper length, switch to bead-chain swivels, and stagger leader lengths between rods by 6 to 12 feet.
- Weeds fouling your gear: Switch from a cannonball to a diver, or shorten your drop and check hooks more frequently through weedy stretches.
- No bites despite marking fish: Change flasher size or color first, then adjust speed by 0.3 to 0.6 mph, then try shifting depth by 5 to 10 feet before moving spots entirely.
Work through these adjustments one at a time. Changing three variables at once means you’ll never know which one actually turned the bite on.
Field Notes From Building Chinook Rigs on the Water
Years of running gear through Pacific Northwest tides teaches you that small construction details separate rigs that hold up from rigs that fail at the worst moment. One habit worth adopting: when crimping a loop on a bumper or leader, flare the crimp slightly after setting it. A flat crimp can slip under sustained pressure from a big king, especially when a fish surges hard on a strong tide. A flared crimp holds.
The gear that survives a full day of Columbia River tide changes isn’t the gear with the fanciest finish. It’s the gear built with terminal components rated for the actual pressure Chinook put on a line, not just baseline saltwater use.
Pro Tip: On a typical trip, our crew brings at least a dozen pre-tied leaders and double the weights we think we’ll need. Running out of a specific weight mid-tide change is how you lose fishable time, and fishable time is the whole game.
Keeping rods actually fishing, rather than sitting in rod holders with fouled bait, is the difference between a slow day and a limit.
What the Data Actually Tells Us About Chinook Rigs
Most rigging advice out there treats every Chinook setup as interchangeable, as if one flasher size and one weight works everywhere from a tidal bay to a deep river hole. It doesn’t. The gap between generic advice and what actually produces fish comes down to matching your rig’s specs (flasher size, leader length, weight) to the exact water column and clarity in front of you, not to a one-size formula copied from a tackle box insert.
The overrated piece of conventional wisdom is color. Anglers spend more time debating chrome versus chartreuse than they spend checking whether their bumper length is causing tangles or whether their scope is actually holding depth. Fix your mechanics first. Color is a secondary lever, not a primary one.
What deserves more attention: leader length as a tuning tool. Two or three inches of adjustment on a tail leader solves more blown baits and tangles than any lure swap ever will. Anglers who treat leader length as fixed are leaving fish in the water.
Build Your Chinook Spread With Highclasstackleco
Every rig in this guide depends on terminal tackle that holds up when a big king surges against a tight drag, and that’s exactly where Highclasstackleco built its reputation. Instead of guessing whether a generic crimp or snap swivel will survive a hard tide change, you get components designed by anglers who troll the same Pacific Northwest water you do.
Highclasstackleco’s terminal tackle and components collection has the crimps, snaps, and bead-chain swivels this guide calls for, so your quick-change routine holds up during a real bite window instead of failing at the worst moment. Pair that with a component tackle box to keep pre-tied leaders organized and labeled by length, exactly the system that saves fishable time on the water. Browse the full lineup at Highclasstackleco and stock your box before your next Chinook trip.
Frequently Asked Questions About Chinook Trolling Rigs
What’s the best all-around Chinook trolling setup? A downrigger paired with an 11" flasher and cut-plug herring, run at 8 to 16 ounces and 1.8 to 3.0 mph, covers the widest range of depths and conditions for Chinook salmon fishing rigs.
How long should my leader be behind a flasher? It depends on the lure. Herring runs 22 to 36 inches, spoons need 30 to 42 inches, plugs need 48 to 60 inches, and hoochies sit around 30 to 36 inches.
What weight should I run for chinook trolling setups in 30 feet of water? Run 8 to 12 ounces in that depth range, adding 4 to 6 ounces if the current is running strong.
How fast should I troll for Chinook salmon? Adjust trolling speeds depending on fish activity and lure type.
How many pre-tied leaders should I bring on a trip? Bringing multiple pre-tied leaders per rod helps maintain fishing efficiency by minimizing on-water knot-tying.
Sources
For deeper rig diagrams and knot tutorials, the rigging tutorial at knots.fish covers the full sequence in visual detail. For Columbia River specific tactics on weight and line choice, read Randall Bonner’s trolling breakdown. Fall-specific flasher sizing is covered well in Game & Fish’s trolling tactics piece.
On the High Class Tackle Co. side, check out Willamette spring Chinook tactics and the tide fishing guide for salmon bays for regional depth.
- Knots
- Trolling Flashers for Salmon Fishing | 360 Rigging Guide & Best Setups | 2025
- TROLLING FOR CHINOOK ON THE COLUMBIA RIVER - Randall Bonner
- Trolling Tactics for Fall Chinook - Game & Fish
Recommended
- Willamette Spring Chinook Trolling: Tactics That Work – High Class Tackle Co.®
- What Is a Salmon Teaser? Rigging & Tuning Guide – High Class Tackle Co.®
- Salmon plug fishing rivers: Proven PNW tactics and gear – High Class Tackle Co.®
- Saltwater Bottom Fishing Rigs: Build, Tie, and Fish Them – High Class Tackle Co.®
0 comments