

Brining herring is defined as soaking fillets in a salt-based solution to firm the flesh, preserve freshness, and intensify flavor for both fishing bait and culinary preparation. Whether you’re rigging up for Chinook on the Pacific Northwest coast or curing a batch of pickled herring for the table, the process is the same at its core: salt draws moisture out, tightens the protein structure, and creates an environment where bacteria can’t take hold. The key variables are salt concentration, temperature, and time. Get those three right and you’ll produce brine cured fish that holds up on the hook and tastes outstanding in the kitchen. The herring brine ingredients you need are simple: non-iodized salt, water, and sugar.
What is the ideal salt concentration for brining herring?
Salt concentration is the single most important variable in any brine fish recipe. A quick brine uses 6% salt for a 12-minute soak, while a slower method drops to roughly 4.7% salt combined with sugar and runs 5 to 12 hours. The quick soak is ideal for bait prep when you need herring ready fast. The slow soak builds more complex flavor and firmer texture for culinary use.
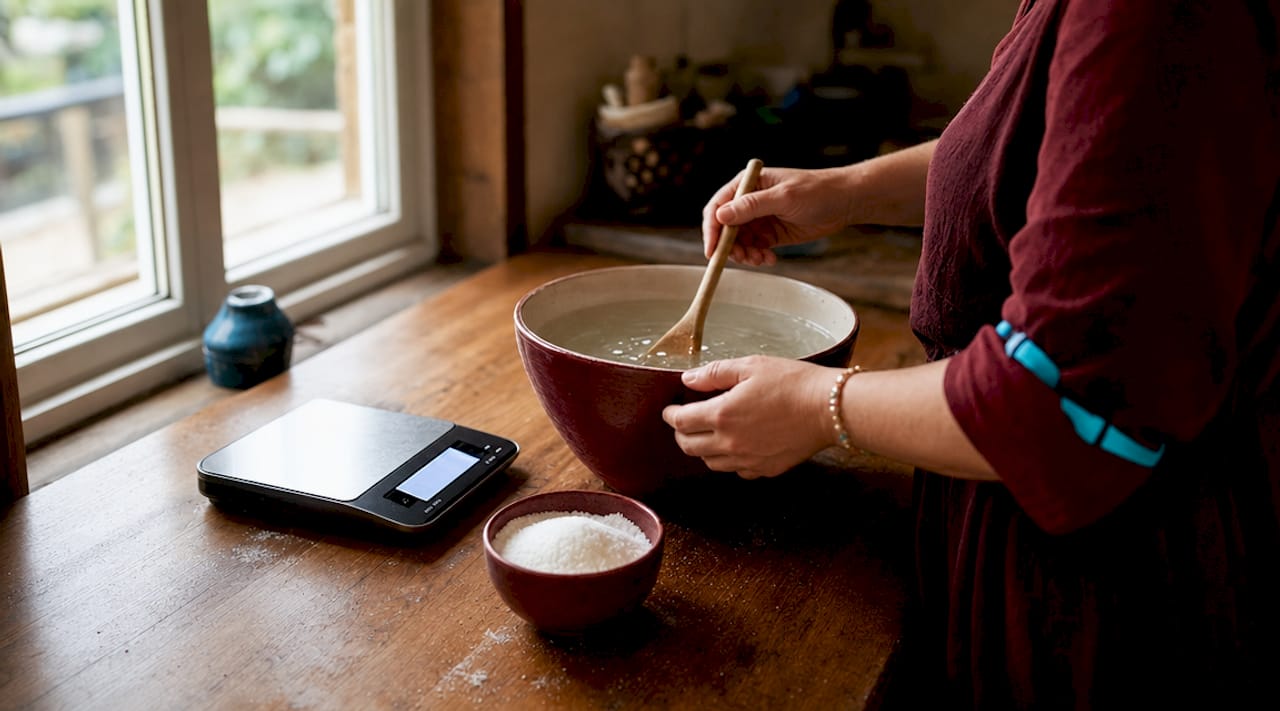
Salt type matters just as much as concentration. Fine-grade, non-iodized salt dissolves evenly and creates a consistent brine throughout the container. Rock salt can leave undissolved granules that create pockets of uneven concentration, which softens some fillets while over-curing others. Kosher salt and pickling salt are the two most reliable choices for herring brining.
Temperature control is non-negotiable. Brine temperature in the upper 30s °F prevents bacterial growth and keeps the flesh firm throughout the soak. Any warmer and you risk spoilage before the salt has time to do its job. Use a refrigerator or a cooler packed with ice, and check the temperature if you’re brining for more than a few hours.
Key herring brine ingredients for a standard wet brine:
- Non-iodized kosher salt or pickling salt (never table salt with iodine)
- Cold filtered water or tap water that has been chilled
- White granulated sugar or brown sugar for flavor balance
- Optional: white vinegar, dill, allspice, bay leaves, or lemon zest for culinary brines
Sugar added to brine softens the sharpness of salt and adds a subtle complexity to the finished fish. For bait brining, sugar also helps the herring hold its color and sheen in the water, which matters when you’re trying to trigger a strike.
Pro Tip: Dissolve salt and sugar completely in warm water first, then chill the solution before adding herring. Adding fish to a warm brine, even briefly, accelerates surface spoilage and ruins the texture.
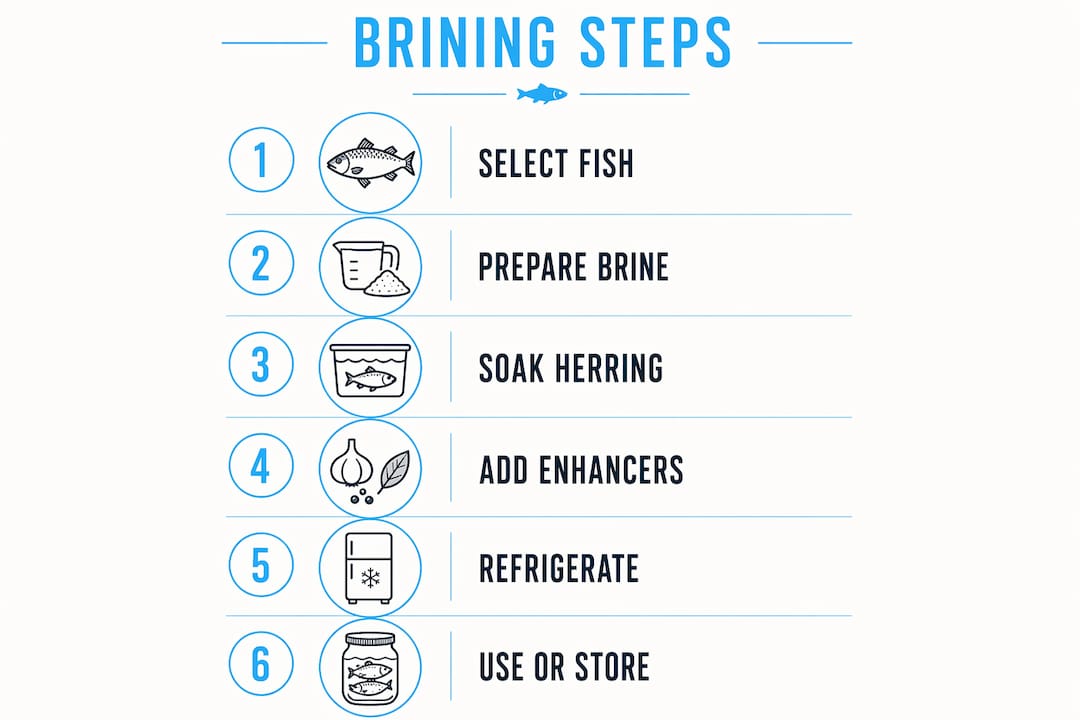
How to brine herring step by step
The process differs depending on whether you’re preparing bait or heading toward a pickled herring recipe. Both start with the same foundation: fresh, quality fish.
Selecting the right herring
Start with the freshest herring you can source. Press the flesh with your finger. It should spring back firmly. The gills should be bright red, the eyes clear, and the smell should be clean and oceanic. Experts confirm that herring smelling sour before brining is too far gone to recover. No brine will fix spoiled fish. Discard it and start with a fresh batch.
Step-by-step wet brine process
- Mix your brine. Combine non-iodized salt and sugar in warm water until fully dissolved. For a quick bait brine, use 6% salt (roughly 1 tablespoon per cup of water). For a culinary slow brine, use 4.7% salt with an equal weight of sugar.
- Chill the brine. Bring the solution down to the upper 30s °F before adding fish. Never skip this step.
- Prepare the herring. Rinse fillets under cold water and remove any visible blood or scales. For culinary use, butterfly or fillet the fish. For bait, keep them whole or cut to your preferred size.
- Submerge the fish. Place herring in a glass, ceramic, or food-grade plastic container. Metal containers react with salt and vinegar, which taints the brine and the fish. Keep fillets fully submerged using a small plate or weight.
- Soak for the correct time. Quick bait brine: 12 minutes. Slow culinary brine: 5 to 12 hours. Dry brine for pickling: 24 hours.
- Rinse and dry. After brining, rinse fillets under cold water to remove excess surface salt. Then pat fillets thoroughly dry before the next step. Skipping the drying stage dilutes the pickling solution or bait cure you apply afterward.
- Label and store. Write the brine date and time on the container. Airtight containers with proper labeling extend shelf life and keep bait usable for days without degradation.
Pro Tip: For bait brining, add a splash of Pro-Cure herring oil to the brine during the last two minutes of the soak. It loads the herring with scent that bleeds into the water column and drives salmon wild.
Dry brine method for pickling
The dry brine approach skips water entirely. A 50/50 mix of kosher salt and white sugar packed around herring fillets for 24 hours draws out moisture and firms the flesh before pickling. This method produces a denser, more flavorful fillet and is the preferred starting point for traditional pickled herring recipes. After the dry brine, rinse the fillets, pat them dry, and move them directly into your pickling solution for a minimum of 48 hours.
How do popular brine recipes compare?
Not all brines produce the same result. The recipe you choose depends on your goal: maximum bait durability, a quick culinary preparation, or a traditional pickled herring recipe with complex flavor.
| Recipe style | Salt ratio | Sugar | Vinegar | Soak time | Best use |
|---|---|---|---|---|---|
| Quick wet brine | 6% salt | Optional | No | 12 minutes | Salmon bait |
| Slow wet brine | 4.7% salt | Equal to salt | No | 5 to 12 hours | Culinary fillets |
| Dry brine | 50% kosher salt | 50% white sugar | No | 24 hours | Pre-pickling prep |
| Polish-style pickled | Moderate salt | Light | White vinegar | 48 hours minimum | Table presentation |
| Pacific Northwest pickled | Moderate salt | Brown sugar | Apple cider vinegar | 48 to 72 hours | Regional flavor profile |
Vinegar plays a specific chemical role in pickled herring that goes beyond flavor. Pickling vinegar decomposes pin bones during the refrigerated soak, making the fish safe and pleasant to eat without deboning. This step is frequently skipped by first-timers, which results in a finished product that’s technically pickled but still full of sharp little bones. Allow at least 48 hours in the vinegar-based pickling solution.
Traditional Polish-style pickled herring uses white vinegar, onion, allspice, and bay leaves for a sharp, clean flavor. Pacific Northwest methods tend to favor apple cider vinegar and brown sugar, producing a sweeter, more rounded profile that pairs well with smoked herring in brine or alongside grilled salmon. For a brined herring salad, the Pacific Northwest style works better because the softer acidity doesn’t overpower fresh herbs or cream-based dressings.
Pickling is both preservation and cooking. Patience during refrigerated fermentation transforms raw fish into a tender, deeply flavored product. Rushing the process by cutting the soak short produces herring that tastes sharp and unfinished.
What mistakes ruin a herring brine?
Most failed brines come down to four repeatable errors. Knowing them in advance saves you a batch of fish and a lot of frustration.
- Using the wrong salt. Iodized table salt inhibits fermentation and creates off-flavors. Always use non-iodized kosher salt or pickling salt. Rock salt that fails to dissolve creates uneven concentration zones that produce soft spots in the finished fillet.
- Ignoring temperature. Brine that warms above the upper 30s °F during a long soak becomes a bacterial incubator. Check your cooler or refrigerator temperature before starting any soak longer than 30 minutes.
- Brining compromised fish. No salt concentration fixes fish that has already started to turn. Bright gills, clear eyes, and a clean smell are the three non-negotiable freshness checks before any herring goes into brine.
- Skipping the dry step. Wet fillets carry diluted brine into the next stage of preparation. Whether you’re applying a cure for bait or moving into a pickling solution, surface moisture weakens the result.
Pro Tip: Test firmness before pulling herring from a long brine. Press the thickest part of the fillet. It should feel noticeably firmer than when it went in. If it still feels soft and yielding, give it another hour and check again.
Keep fish fully submerged throughout the entire soak. Exposed surfaces oxidize and develop a gray, unappetizing color. A small ceramic plate or a zip-lock bag filled with water works perfectly as a weight inside the container.
Key takeaways
Brining herring correctly requires non-iodized salt, precise temperature control in the upper 30s °F, and soak times matched to your specific goal, whether bait or table.
| Point | Details |
|---|---|
| Salt concentration drives results | Use 6% for a 12-minute quick brine or 4.7% with sugar for a 5 to 12-hour slow brine. |
| Temperature is non-negotiable | Keep brine in the upper 30s °F throughout the soak to prevent spoilage and preserve texture. |
| Dry brine before pickling | A 50/50 kosher salt and sugar dry brine for 24 hours firms fillets before any pickling solution. |
| Vinegar dissolves pin bones | At least 48 hours in vinegar-based pickling solution chemically breaks down small bones. |
| Pat dry after rinsing | Thoroughly drying fillets after brining protects brine adherence and pickling solution strength. |
What I’ve learned from years of brining herring
The biggest lesson I’ve taken from brining herring across dozens of salmon seasons and kitchen batches is this: timing variations matter more than most people admit. I’ve run side-by-side tests with 12-minute quick brines versus 8-hour slow brines on the same batch of fresh herring, and the difference in bait durability on the hook is real. The slow-brined herring stays intact through multiple casts and holds scent longer. That’s not a small edge when you’re fishing deep water for Chinook.
On the culinary side, I’ve found that most home cooks under-pickle. They pull the herring at 24 hours because it looks done. It isn’t. The vinegar needs the full 48 hours to work through the flesh and soften those pin bones. I’ve eaten herring pulled at 24 hours and herring pulled at 72 hours from the same batch. The 72-hour version is a completely different product. Tender, clean, and worth serving to anyone.
The other thing I’d push back on is the instinct to over-salt. More salt does not mean better preservation. It means tough, overly salty fish that nobody wants to eat and bait that repels rather than attracts. Stick to the ratios, trust the process, and resist the urge to add more salt because you’re nervous. Brining is patient work. The anglers and cooks who get the best results are the ones who measure, chill, and wait.
— Nick
Stock up on brining supplies at Highclasstackleco

Highclasstackleco carries everything you need to run a clean, effective brine from start to finish. Grab Pro-Cure non-iodized rock salt for consistent, even dissolving every time, and pair it with Pro-Cure herring oil to load your bait with the scent that puts salmon in the net. For anglers who want to take their bait prep to the next level, the full lineup of curing agents and brine products at Highclasstackleco is built for real-world West Coast fishing conditions. Quality supplies produce quality results. Don’t cut corners on the prep that happens before the fish ever hits the water.
FAQ
What salt should I use to brine herring?
Use fine-grade, non-iodized kosher salt or pickling salt. Iodized table salt creates off-flavors and inhibits fermentation, while rock salt can fail to dissolve fully and produce uneven brine concentration.
How long does it take to brine herring for bait?
A quick 6% salt brine takes just 12 minutes for herring fillets. For a firmer, longer-lasting bait, a slower 4.7% salt and sugar brine runs 5 to 12 hours in the refrigerator.
Can you brine herring for pickling at home?
Yes. Apply a 50/50 dry brine of kosher salt and white sugar for 24 hours, rinse and pat dry, then transfer to a vinegar-based pickling solution for a minimum of 48 hours to soften pin bones and develop full flavor.
Why does my pickled herring still have sharp bones?
The vinegar pickling solution needs at least 48 hours of refrigeration to chemically decompose the small pin bones. Pulling the herring too early leaves bones intact and the texture unfinished.
How do I store brined herring after curing?
Keep brined herring in airtight, non-metal containers fully submerged in brine or pickling solution. Label each container with the brine date and store in the refrigerator. Proper storage with temperature control preserves firm texture and extends shelf life for both bait and culinary use.
Recommended
- Super Bait Secrets: Top Picks for Salmon and Steelhead – High Class Tackle Co.®
- Brad Cut Plug Mastery: Expert Rigging Guide for PNW Anglers – High Class Tackle Co.®
- Hoochie Skirts: the Angler’s Guide to More Fish – High Class Tackle Co.®
- Northwest Bait and Scent Guide for Serious Anglers – High Class Tackle Co.®
0 comments