

For most kokanee anglers, the best all-around choice is an adjustable mid-tension release like the Scotty Mini Power Grip or the Chamberlain adjustable downrigger release. Set your line 1/2 to 2/3 of the way into the clip, test tension with a firm pull before lowering the ball, and you’re ready to fish. If you’re on a tight budget, a DIY sock-hanger clip works as a backup. A small fixed jaw clip like the Scotty Mini Power Grip in its lightest setting is the runner-up for simplicity.
Kokanee have notoriously soft mouths. A release lets you fight the fish on a light rod instead of dragging it against the weight of the downrigger ball and cable, which tears hooks free. According to Idaho Fish and Game, kokanee suspend near the thermocline, and downriggers are one of the most reliable ways to hold your gear at that exact depth. Getting the release right is what connects all of it.
- Best adjustable: Scotty Mini Power Grip / Chamberlain adjustable release
- Best simple fixed clip: Scotty Mini Power Grip (lightest setting)
- Best budget/backup: DIY sock-hanger clip
- First action: Insert line 1/2–2/3 into clip, pull-test before lowering
Key Takeaways
The most effective kokanee downrigger release setup pairs an adjustable tension clip with a soft-tip rod, a light drag reel, and a latex snubber to protect soft mouths and maximize hookups.
| Point | Details |
|---|---|
| Best release choice | Scotty Mini Power Grip or Chamberlain adjustable; start line at 1/2–2/3 into clip. |
| Tension tuning routine | Set drag first, load rod, pull-test before lowering; adjust one click or one position at a time. |
| Leader distance | Run 8–20 feet behind the ball; shorten for deep/structure, lengthen for shallow/clear water. |
| Maintenance | Rinse after every trip, oil monthly, replace pads annually or when release force becomes uneven. |
| Highclasstackleco | Carries terminal tackle, snubbers, and accessories that complete a kokanee downrigger rig. |
Table of Contents
- How do different kokanee downrigger releases compare?
- How do you set downrigger release tension for kokanee?
- How far behind the downrigger ball should you run your lure?
- Are DIY clips worth building, or should you buy commercial releases?
- How does the release fit into your full kokanee rig?
- What causes premature trips and failure to trip, and how do you fix them?
- What do experienced kokanee anglers actually tune differently?
- What a single tension tweak taught us on the water
- Gear that completes your kokanee release setup
- Sources
How do different kokanee downrigger releases compare?
Sport Fishing Magazine confirms that depth and speed control are the two dominant variables in kokanee trolling, and your release is the hinge point between both. Pick the wrong style and you’re either popping off on every small fish or missing bites entirely.
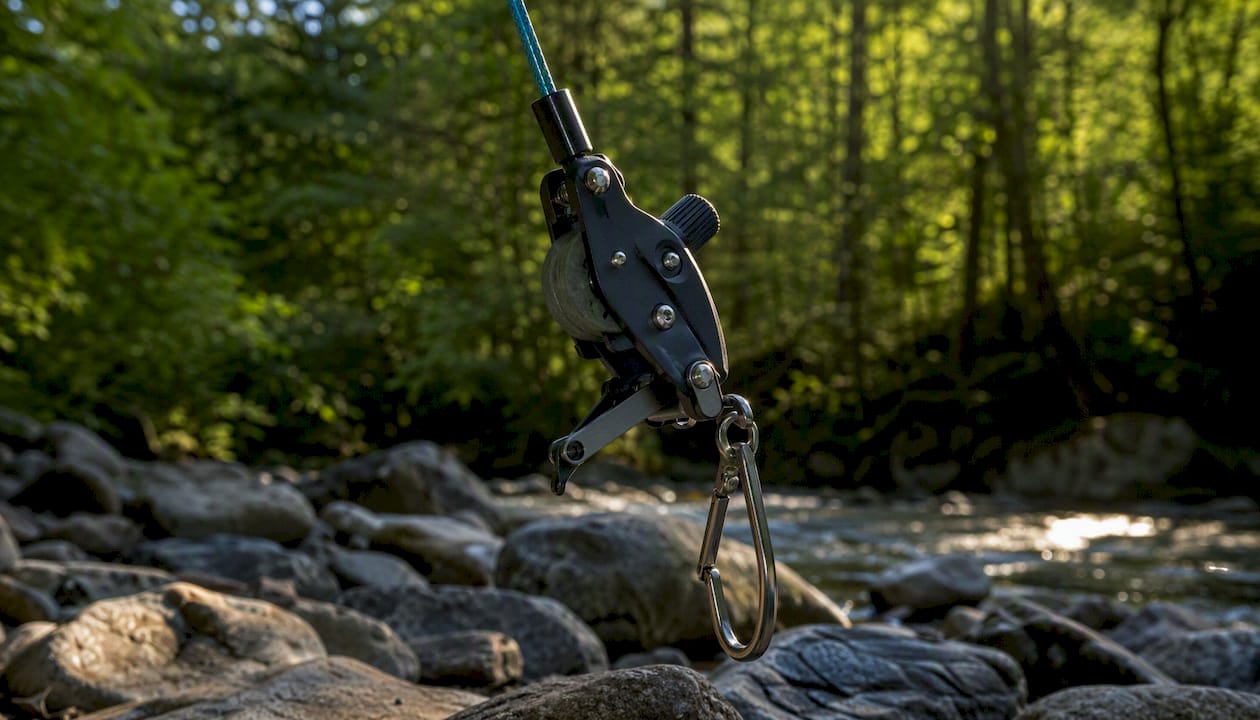
Adjustable tension releases
The Scotty Mini Power Grip and the Chamberlain adjustable release both let you dial tension in small increments, typically from under 1 lb up to 4–5 lbs. That range covers small kokanee in early season all the way to slab fish in summer. Fewer false trips, cleaner hookups. The tradeoff is a slightly higher price and a few more moving parts to maintain.
Small fixed jaw clips
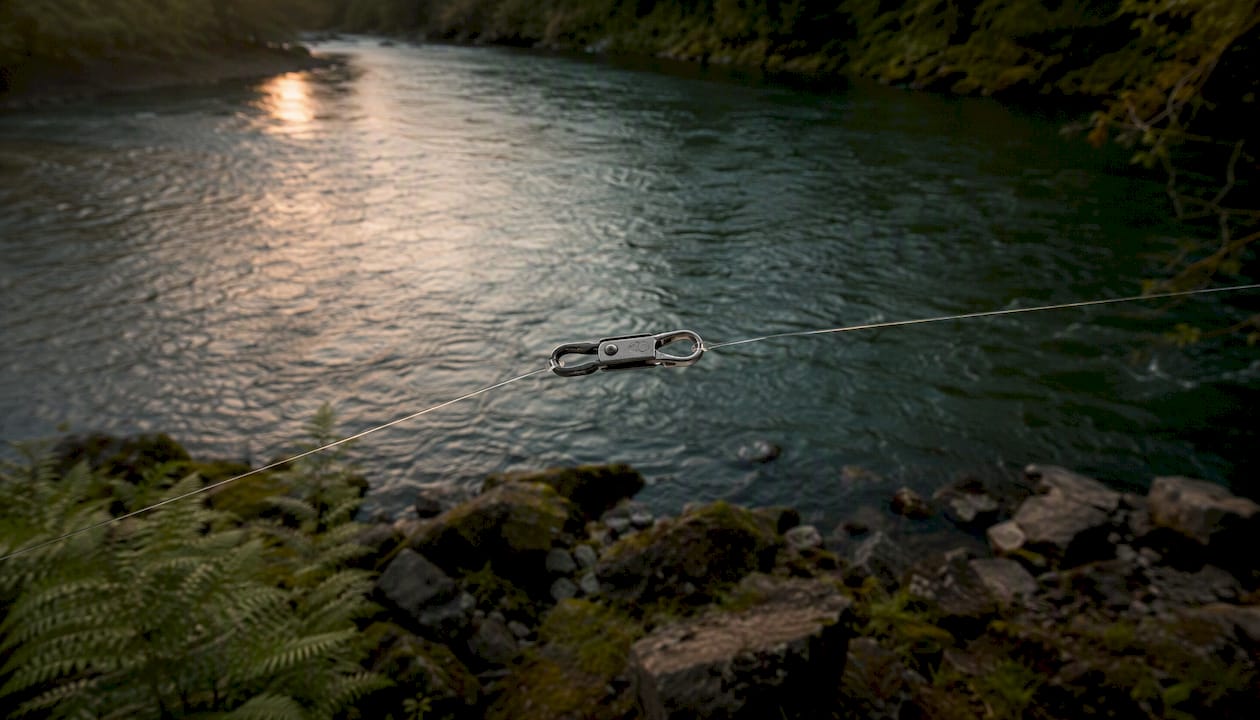
Simple jaw-style clips have no adjustment dial. They hold at a fixed tension, usually in the 2–4 lb range depending on how far into the clip you seat the line. They’re fast to clip in and out, nearly indestructible, and cheap. The limitation is that you’re stuck fine-tuning tension purely by changing line placement rather than turning a knob.
DIY and low-cost options
A how-to roundup at Outdoor Troop notes that sock-hanger clips and modified snap swivels serve well as low-cost backups. They cost almost nothing, but release consistency is variable and they need frequent inspection.
| Feature | Adjustable release | Fixed jaw clip | DIY clip |
|---|---|---|---|
| Best for | Precision, bite sensitivity | Simplicity, speed | Budget, emergency backup |
| Tension range | 1–5 lbs (adjustable) | ~2–4 lbs (position-dependent) | Variable |
| Ease of use | Moderate | Very easy | Easy but inconsistent |
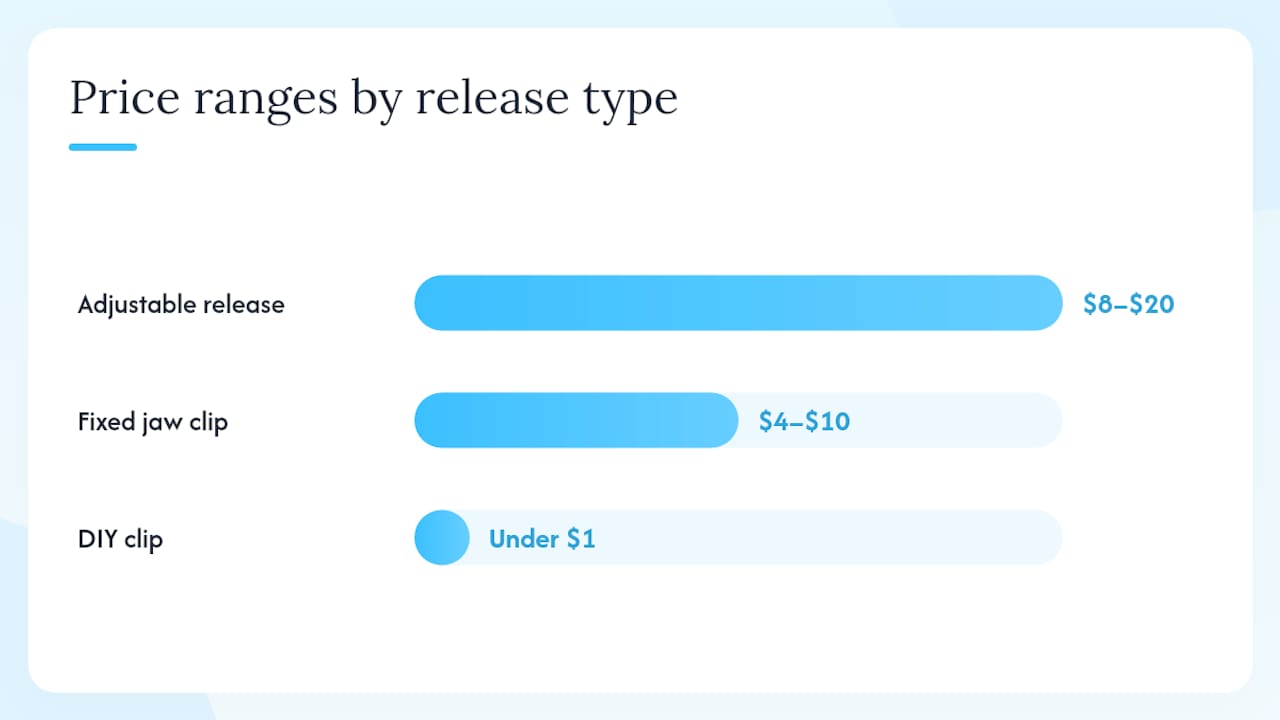
| Price range | $8–$20 | $4–$10 | Under $1 |
| Corrosion resistance | Stainless/nylon (good) | Stainless (good) | Low (rust-prone) |
| US availability | Wide (tackle shops, online) | Wide | Hardware stores |
Pro Tip: If you fish kokanee more than a few times a season, the Scotty Mini Power Grip pays for itself in fish you don’t lose. The Chamberlain is worth the extra dollar or two if you stack multiple rods.
How do you set downrigger release tension for kokanee?
Kokanee confirms that line placement in the clip, about 1/2 to 2/3 of the way in, is the starting point most experienced anglers trust. Here’s the full routine:
- Set your rod drag first. Dial it light, around 1–2 lbs for kokanee. The release tension should be slightly higher than your drag so the rod loads before the clip fires.
- Load the rod. Place the rod in the holder and pull the line back to the release. The rod tip should bend slightly.
- Seat the line in the clip. Start with the line 1/2 to 2/3 into the jaws. Deeper seating = more tension required to trip.
- Pull-test before lowering. Give the line a firm, steady pull simulating a kokanee headshake. The clip should release cleanly without excessive force.
- Lower the ball and watch the rod tip. It should hold a slight load. If it’s dead straight, the clip is too loose.
- Fine-tune in small increments. Move the line slightly deeper for more tension, shallower for less. On adjustable models, turn the dial one click at a time.
Troubleshooting:
- Premature releases: Line too shallow in clip, tension too light, or worn rubber pads. Reseat deeper or replace pads.
- Failure to trip: Line too deep, tension too heavy, or clip jaws are sticky from salt/grime. Clean jaws and reseat shallower.
Pro Tip: Simulate a kokanee headshake on the dock before you launch. Hold the rod in the holder, clip the line, then flick the rod tip sharply. If the clip fires on that flick, tension is dialed in. If it doesn’t, go shallower in the clip.
How far behind the downrigger ball should you run your lure?
Idaho Fish and Game notes that when fishing deeper than 25 feet, the exact distance from ball to lure is less critical than matching depth and speed. That said, leader distance still affects how your lure behaves and whether you spook fish.
Typical starting range for kokanee is several feet behind the ball. Early season, when fish are shallow and skittish, run longer leaders, 15–20 feet, to keep the ball away from the presentation. In summer, when fish are deep and tight to the thermocline, 8–12 feet is often enough.
The “100-foot rule” you’ll hear about is a trolling safety guideline for long-lining, not a downrigger standard. ODFW recommends downriggers specifically when you need to go deeper than 30–40 feet, where long-lining can’t hold depth accurately.
When to shorten your leader:
- Fish are deep and tight to structure
- You’re running a dodger (dodger-to-lure distance matters more than ball-to-dodger)
- Boat traffic is light and fish aren’t spooked
When to lengthen your leader:
- Early season, fish are shallow and wary
- Clear water conditions
- You’re not running a dodger and want more lure action
For dodger spacing specifics, the kokanee dodger spacing guide at Highclasstackleco breaks down leader length by setup type.
Are DIY clips worth building, or should you buy commercial releases?
DIY clips can absolutely catch fish. The most common builds use plastic sock hangers, small binder clips, or modified clothespins. Here’s what you need and what to expect:
Basic sock-hanger clip:
- Materials: plastic sock hanger (the kind with two jaws), a small snap swivel, zip tie or split ring
- Attach the snap to one jaw, clip to the downrigger cable, seat the line between the jaws
- Cost: under $1 per clip
Modified clothespin:
- Sand the jaws lightly for smoother release
- Wrap rubber band around the hinge for adjustable tension
- Clip to cable with a snap swivel
Pros of DIY:
- Near-zero cost, easy to replace mid-trip
- Good for testing tension concepts before buying commercial clips
Cons of DIY:
- Inconsistent release force trip to trip
- Plastic degrades fast in UV and saltwater spray
- No corrosion resistance; metal parts rust quickly
Pro Tip: Carry two or three DIY clips as emergency backups, but don’t rely on them as your primary release on a serious kokanee day. One missed fish from a sticky clip costs more than the $10 you saved.
Outdoor Troop’s roundup confirms DIY options work as budget backups but need frequent inspection and replacement on heavy-use days.
How does the release fit into your full kokanee rig?
The release doesn’t work alone. It’s part of a system, and every piece affects how the others perform.
Rod and reel match:
- Use a soft-tip rod, 7–8.5 feet, rated for 4–10 lb line. A stiff rod won’t load properly against the release and can yank the hook on the strike.
- Set reel drag at 1–2 lbs. The release tension should sit just above drag weight so the rod loads before the clip fires.
Snubbers:
- A 6–12 inch rubber snubber between the release and the lure absorbs the shock of the strike. This is critical for kokanee’s soft mouths. Latex snubbers stretch more than surgical tubing and tend to last longer in cold water.
- Snubber length affects lure action. Shorter snubbers (6 inches) give more direct feel; longer ones (12 inches) cushion harder strikes.
Release position on cable:
- Position the release so the rod tip is loaded but not over-bent when the line is clipped in. Some anglers attach a short braided leader with a snap to Chamberlain-style releases so the clip stays within arm’s reach for quick resets without bending over the gunwale.
Dodger integration:
- Run the dodger 18–24 inches behind the release, then 6–12 inches of leader to the lure. The dodger creates flash and action; the snubber protects the hookset. For more on kokanee scent bait pairings that work with this setup, Highclasstackleco has a full breakdown.
What causes premature trips and failure to trip, and how do you fix them?
Most release problems trace back to three things: dirty jaws, worn pads, or wrong line placement. Here’s a fast on-water checklist:
- Premature releases: Reseat line deeper in clip. Check rubber pads for wear or compression. Tighten tension dial one click if adjustable.
- Failure to trip: Move line shallower in clip. Clean jaws with a damp cloth. Loosen tension dial one click.
- Slipping under load: Pads are glazed or compressed. Replace pads or the whole clip.
- Stiff or sticky jaws: Rinse with fresh water, apply a drop of reel oil to the pivot point.
- Cable fouling: Check for kinks or rust on the downrigger cable near the release. ODFW’s tech tips recommend using digital mapping to avoid sudden bottom contour changes that snag gear.
Maintenance schedule:
- After every trip: rinse clip with fresh water, wipe dry
- Monthly (or mid-season): light oil on pivot points and tension dial
- Annually: replace rubber pads or tension bands; inspect for rust on metal components
Signs it’s time to replace a release:
- Rust on jaws or spring that won’t clean off
- Uneven release force (fires on one side before the other)
- Brittle or cracked rubber pads
- Clip won’t hold tension even at maximum setting
Pro Tip: Keep a small zip-lock bag in your tackle box with two spare releases, a set of replacement pads, and a mini bottle of reel oil. A five-minute fix on the water beats a ruined morning.
What do experienced kokanee anglers actually tune differently?
The biggest gap between average and great kokanee anglers isn’t the gear. It’s how they read the water and adjust in real time.
Depth and speed are the two variables that matter most in kokanee trolling. Downriggers give you the most accurate depth control and let you run larger flashers for attraction — but only if your release tension is dialed in to match the fish size and trolling speed you’re running that day. Adjust tension any time you change speed by more than 0.3 mph or move to a new depth band.
Field-tested adjustments experienced anglers make:
- Small early-season kokanee (under 12 inches): lighten tension to 1–1.5 lbs, seat line at 1/2 into clip. These fish barely load the rod.
- Larger slab fish (14 inches and up): tension at 2.5–3.5 lbs, line 2/3 into clip. They hit harder and need more resistance to trip cleanly.
- When sonar shows fish scattered across a depth band, run two rods at slightly different depths and compare which release fires more. This tells you the feeding layer faster than any chart.
- Manual popping — jerking the rod tip to free the line the moment you see a hit on the rod — produces cleaner hookups on small kokanee than waiting for the fish to fully trip the release. It removes slack instantly and keeps pressure on a soft mouth.
For new tackle releases and gear updates relevant to kokanee setups, Bass Angler Magazine’s ICAST coverage tracks what’s coming out of the industry each season.
What a single tension tweak taught us on the water
One morning on a high-elevation reservoir, we were getting hits but landing nothing. Switched the line placement from 2/3 to 1/2 into the clip, and the next three fish came to the net clean. That’s the whole lesson: small adjustments, logged and repeated, beat guessing every time.
Packing list for release tuning and emergency repairs:
- 2 spare commercial releases (Scotty Mini Power Grip or Chamberlain)
- 2–3 DIY sock-hanger clips as backup
- Replacement rubber pads or tension bands
- Mini reel oil bottle
- Snap swivels (size 10–12) for quick leader swaps
- Small notepad or phone note to log: depth, line placement in clip, boat speed, and fish size
Log your settings every trip. When you hit a productive pattern, you can replicate it the next time you’re on the same water.
Gear that completes your kokanee release setup
The release is just one piece. The terminal tackle around it determines whether you land the fish.
Highclasstackleco carries the terminal tackle and components that pair directly with downrigger release setups: snubbers, snaps, hooks, and leader components built for kokanee and salmon trolling on the West Coast. Grab a spare release, a set of latex snubbers, and the right hooks in one order instead of hunting across three stores. The accessories collection covers the small-but-critical pieces, from snap swivels to leader material, that keep your rig running clean all season. Head to Highclasstackleco and build your kokanee kit before your next launch.
Sources
These are the resources that informed this guide. Each one adds something specific.
- F&G staff gives kokanee fishing tips to help you better understand (and catch) these unique fish | Idaho Fish and Game
- Kokanee fishing Oregon | Oregon Department of Fish and Wildlife (ODFW)
- How to catch kokanee salmon | Sport Fishing Magazine
- Best Downrigger Release Clips for Kokanee - Kokanee Fishing
- Best Downrigger Clips for Kokanee Fishing (And how to set it up) – Outdoor Troop
Recommended
- Kokanee Dodger Spacing Guide: Dial Leader Length for More Bites – High Class Tackle Co.®
- Kokanee Scent Bait Tips That Double Your Hookups – High Class Tackle Co.®
- What Is a Salmon Teaser? Rigging & Tuning Guide – High Class Tackle Co.®
- Best Highhooklures.com Alternatives for Salmon & Steelhead – High Class Tackle Co.®
0 comments