

Need color fast? Grab nail polish or try the blade-dip method. Both get you a fresh finish in minutes for next to nothing. Want the best all-around DIY result, the kind that holds up trip after trip? Spray or airbrush over primer, then seal it with a real clearcoat. That combo gives you sharp detail and solid durability without a garage full of equipment. Chasing a finish that survives a full season of hard fishing, or need a batch of identical blades? Powder painting wins, but it demands heat control and practice.
Here’s the quick breakdown:
- Fastest, cheapest: nail polish (Sally Hansen works great) or a quick blade-dip
- Best all-around DIY finish: primer plus thin coats of airbrush paint like Createx, sealed with clearcoat
- Most durable for batches: powder painting with a heat source and practice runs
- Buying option: High Class Tackle Co. sells pre-finished blade packs if you’d rather skip the bench work entirely
Key Takeaways
Painting spinner blades successfully comes down to matching the method to your durability needs while preserving the blade’s balance and spin throughout every step.
| Point | Details |
|---|---|
| Choose your method by goal | Use nail polish for quick tests, spray or airbrush for balanced DIY quality, powder for maximum durability. |
| Prep decides paint longevity | Scuff with 400 to 800 grit, clean with acetone, and prime before any color goes on. |
| Bevel every edge | Angling the blade’s edge keeps paint and clearcoat from lifting where fish and rocks make contact. |
| Seal in thin layers | Apply clearcoat in light passes and test spin between coats to avoid adding imbalance. |
| Buy pre-finished when it counts | High Class Tackle Co. offers ready-made blade packs for anglers who want consistent, durable finishes without a full paint setup. |
Community Threads and Practical How-Tos to Read Next
- Powder painting how-to for step-by-step heat timing
- Wire Baits prep thread for sanding and sealing tips
- Test on scrap blades and join the conversation in active tackle-maker forums
Table of Contents
- Materials and Tools for Painting Spinner Blades
- How Do You Prep a Spinner Blade Before Painting?
- Which Painting Method Should You Choose?
- Method 1: Nail Polish and Blade-Dip Touch-Ups
- Method 2: Spray and Airbrush Painting for a Pro-Level Finish
- Method 3: Powder Painting for Maximum Durability
- Layering, Masking, and Patterns That Work on Small Blades
- Which Clearcoat Should You Use to Seal Painted Blades?
- How Do You Know a Painted Blade Still Spins Right?
- How Long Does Painted Blade Finish Actually Last?
- Staying Safe While You Paint and Cure Blades
- When Should You DIY vs. Buy Pre-Finished Blades?
- Want Pro-Grade Finishes Without the Bench Work?
- Frequently Asked Questions
- Sources
Materials and Tools for Painting Spinner Blades
What you need depends entirely on which method you pick, so build your kit around the job, not the other way around.
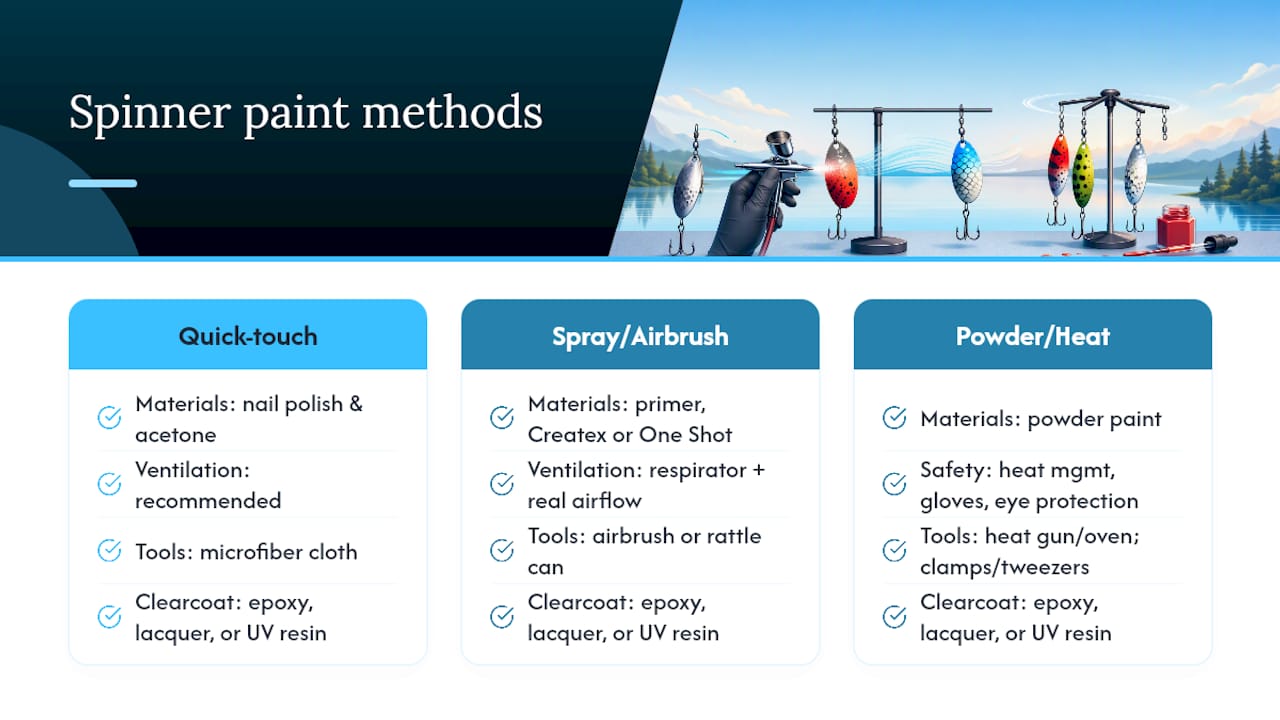
Quick-touch kit: nail polish, acetone, a microfiber cloth, and a clear topcoat.
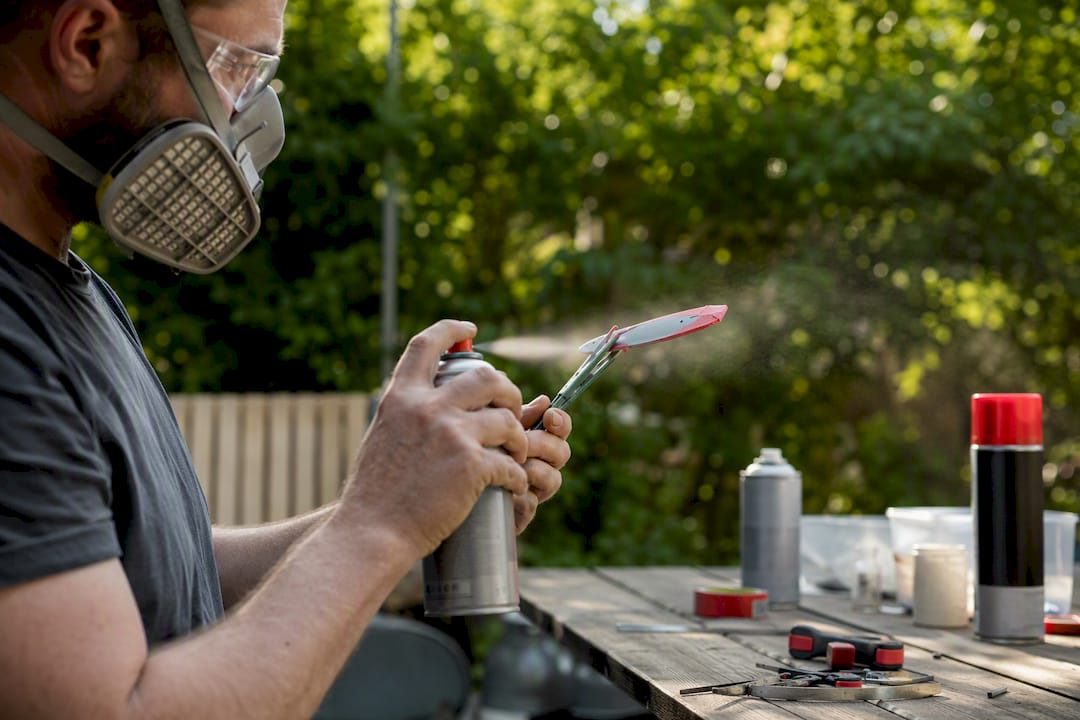
Spray/airbrush kit: primer, Createx or One Shot paint, an airbrush or rattle can, and a proper respirator.
Powder/heat kit: powder paint colors, a heat gun or small oven, and clamps or tweezers to hold the blade.
Across every method, stock these consumables: masking tape, sandpaper in a 400 to 800 grit progression, a rust-inhibiting primer, and your clearcoat of choice, whether that’s two-part epoxy, automotive lacquer, or UV resin. Ventilation matters no matter which route you take. Solvent-based paints need real airflow, and powder work needs heat management, gloves, and eye protection.
Pro Tip: Buy blades in bulk before you start experimenting. If you burn through a batch testing colors, you’ll want backups from High Class Tackle Co.'s terminal tackle and components collection instead of stopping mid-project to reorder.
How Do You Prep a Spinner Blade Before Painting?
Skip prep and your paint job fails within a few casts. This is the step most beginners rush, and it’s the one that decides whether your finish lasts or flakes off in the current.
- Scuff the surface. Sand with 400 to 800 grit paper, or use an abrasive disc or Dremel to lightly bevel the edges. If the blade is plated or lacquered brass, you may need thinner or heavier sanding to strip that factory coating first.
- Clean it completely. Wipe the blade down with acetone or isopropyl alcohol to strip oils and sanding dust. Let it flash-off dry for a couple of minutes before touching it again.
- Prime it. White primer makes bright colors and fluorescents pop; gray works better under darker, more natural patterns. Apply thin, even coats and let the primer fully cure before adding color.
Community builders on Tackle Underground consistently point to acetone cleaning and edge beveling as the two steps that separate a finish that lasts from one that peels within a week.
Pro Tip: Bevel the blade’s edge just slightly so your paint and clearcoat terminate away from that leading edge. Paint that wraps around a sharp edge is the first place it lifts.
Which Painting Method Should You Choose?
Match the method to your goals, not the other way around. Trying five colors on a Friday night calls for nail polish. Building a signature blade for your box calls for spray or airbrush. Running a production batch for a guide trip or a shop calls for powder.
- Quick touch: minimal tools, ideal for testing colors or painting one or two blades
- Spray/airbrush: the best control over color and detail, with good durability when sealed right
- Powder painting: the toughest finish available to a home builder, but it demands heat, practice, and patience
Method 1: Nail Polish and Blade-Dip Touch-Ups
This is the method every angler tries first, and for good reason. It costs almost nothing and dries fast enough to test three colors in one sitting.
- Clean the blade with acetone and let it dry completely.
- Apply one thin coat of nail polish, keeping strokes light and even.
- Let it flash-dry a few minutes, then apply a second coat if the color needs more depth.
- Seal with a clear protective topcoat once the color coat has fully set.
Materials that work well: Sally Hansen polishes are a favorite among hobbyists for their range of colors and easy application, and fine glitter mixed into the topcoat adds flash without extra steps.
- Pros: cheap, fast, no special tools, great for testing patterns
- Cons: limited abrasion resistance, shorter lifespan unless properly sealed, not ideal for hard bottom-bouncing rigs
Keep polish off the blade hole and away from the edges. Paint buildup in either spot changes how the blade tracks and can throw off the spin you worked hard to dial in.
Method 2: Spray and Airbrush Painting for a Pro-Level Finish
This is the sweet spot for most DIY anglers. It takes more setup than nail polish but rewards you with sharper detail and a finish that survives real fishing pressure.
- Prime first, and lean toward white primer under fluorescent colors since it makes them read brighter in stained or off-color water.
- Thin your airbrush paint according to the manufacturer’s directions, though some painters get better adhesion with a slightly thicker mix than the label suggests.
- Apply color in thin layers, masking off sections for stripes or two-tone patterns as you go.
- If you’re using a spray can, lay down light base coats and wet-sand lightly between color layers if you want a glass-smooth base before clear coating.
- Dust glitter or fine flake onto the surface while the final clear coat is still tacky for a finish that catches light underwater.
Forum builders on IFish report that Createx paints are popular for their low odor and easy cleanup, while One Shot sign paint gives richer, deeper color but demands stronger ventilation and different thinning ratios.
Run a respirator and real airflow any time you’re spraying solvent-based paint, and clean your airbrush immediately after each session so dried paint doesn’t clog the nozzle on your next project.
Method 3: Powder Painting for Maximum Durability
Powder painting takes the most setup, but nothing built on a home bench comes close to its toughness. This is the method that separates blades built for a season from blades built for a single trip.
- Preheat the blade briefly, just a few seconds over your heat source.
- Swish the warm blade through your loose powder color.
- Tap off the excess so you don’t end up with a thick, uneven shell.
- Reheat the blade until the powder melts and turns glossy. Never place the blade directly into an open flame, since that scorches the finish and can discolor the metal.
Detailed timing guidance from Luremaking recommends brief heat bursts of a few seconds, warning that overheating leads to coatings that run too thick or blacken the blade’s surface.
Equipment notes: a fluid-bed setup or a basic powder gun works well for volume, but a heat gun and a steady hand handle small batches just fine. Heavier blades hold heat longer, so adjust your timing based on thickness.
- Pros: the most durable, glossiest finish you can get without a professional shop
- Cons: more equipment, more cleanup, and a real risk of overloading small blades with too much coating
Pro Tip: Always test your heat times on scrap blades first. On small spinner blades especially, a coating that’s too thick adds weight in the wrong place and throws off the spin you’re trying to protect.
Layering, Masking, and Patterns That Work on Small Blades
Small surfaces punish sloppy technique, so keep your patterns simple and your layers thin. Start with a white base coat under any fluorescent color, then build color in thin, even layers rather than one heavy pass.
- Two-tone fade: blends two colors across the blade face and reads well in stained water
- Center stripe: a single bold line down the blade’s length, easy to mask cleanly
- Dots near the hole: a small detail that catches light without adding bulk
- Glitter dusting under clear: adds flash without changing the blade’s profile
Low-tack masking tape gives you crisp lines without pulling up your base coat when you remove it. Hold blades on toothpicks or small clamps while painting so you’re not creating contact points that need touch-ups later.
Pro Tip: Plan your pattern around the blade’s hole before you start. If color wraps too close to that opening, you’ll fight it every time you re-thread the blade onto a clevis.
Which Clearcoat Should You Use to Seal Painted Blades?
Your clearcoat decides whether months of careful painting survive contact with rocks, teeth, and current. Each option trades off differently between hardness, speed, and UV resistance.
- Two-part epoxy: hard, thick, and among the most durable finishes for dipped blades
- Automotive clearcoat: fast-drying and UV-resistant, a solid choice for spray-finished blades
- Lacquer: the traditional option, easier to sand and correct if you make a mistake
- UV resin: cures in seconds under a UV lamp, convenient for small batches
Apply clearcoat in multiple light passes rather than one heavy pour. Puddling at the edges is the most common mistake, and it adds weight exactly where you don’t want it. Test the blade’s spin between coats, especially on smaller sizes where even a small imbalance shows up on the retrieve.
Forum comparisons on Walleye Central consistently rank powder and baked coatings above spray and polish for long-term abrasion resistance, which is worth remembering when you’re deciding how many clear coats a given blade actually needs.
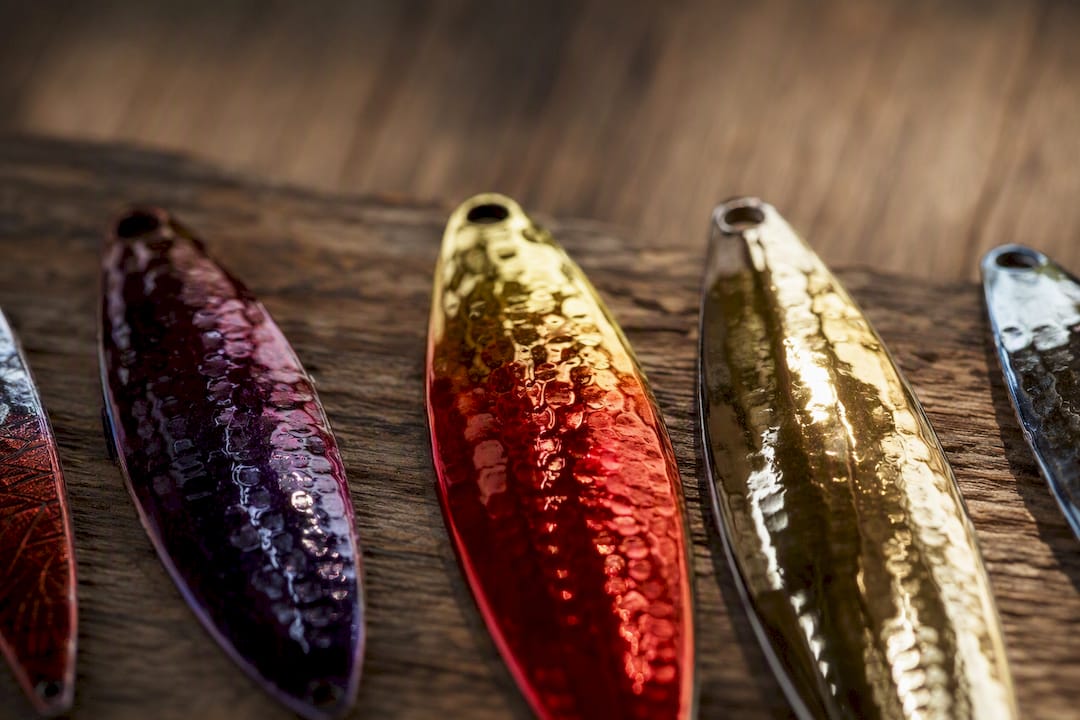
Dipped epoxy tends to suit larger blades built for durability, while sprayed clear fits smaller, lighter blades where you’re trying to avoid adding bulk.
How Do You Know a Painted Blade Still Spins Right?
A blade that looks great but won’t spin is worse than an unpainted one, so testing matters as much as painting.
- Do a finger flick test, spinning the blade on a wire or split ring to check for wobble.
- Rig it on your leader and give it a short pull test in a bucket or shallow water before it ever sees a real cast.
- Watch for tolerance issues on smaller blades, since a #5 or #6 blade shows imbalance far more obviously than a heavier #7 or #8.
Common problems and fixes:
- Edge lifting: re-sand and re-bevel that edge before repainting
- Paint clogging the hole: re-drill or punch it clean rather than forcing the clevis through
- Sluggish or wobbly spin: strip a coat or two of clear, since excess weight is usually the culprit
If a blade fails these checks, strip it back to bare metal, re-prep from scratch, and repaint. That fixes almost every issue without damaging the blade’s metallurgy.
How Long Does Painted Blade Finish Actually Last?
Cure time and durability go hand in hand, and rushing either one is where most DIY jobs fall apart.
Solvent-based sprays and airbrush paints go tack-free within minutes and are handleable within a few hours, but full cure per most manufacturer labels runs 24 to 72 hours. Epoxy clearcoats generally need that same 24 to 72 hour window before you can call them fully hardened. Powder finishes set almost immediately once the paint melts, though the blade itself needs time to cool before handling.
In real fishing conditions, nail polish and thin spray coats wear fastest, especially near hooks and leading edges where abrasion concentrates. Powder coatings and well-applied epoxy hold up considerably longer under the same use, a gap community testing on Walleye Central has confirmed repeatedly across different blade styles.
Let every blade reach full cure before stacking them in a tackle box. Painted surfaces that touch before curing stick together and scuff on separation, undoing hours of careful work.
Staying Safe While You Paint and Cure Blades
Ventilation and heat control aren’t optional extras. They’re what keeps a fun bench project from turning into a health or fire hazard.
- Wear a NIOSH-rated respirator any time you’re spraying solvents or handling powder, along with gloves and eye protection
- Set up real exhaust airflow for any spray booth, even a simple garage setup
- Keep open flame away from finished or in-progress blades, and use a temperature-controlled heat source for powder work
- Keep a fire extinguisher within reach whenever you’re using heat
- Follow local rules for solvent and hazardous waste disposal, and never pour solvents down a drain
- Store solvent-soaked rags in a sealed metal container to prevent spontaneous combustion
When Should You DIY vs. Buy Pre-Finished Blades?
Honest answer: it depends on what you’re actually trying to accomplish.
- DIY makes sense when you want a custom color nobody else is running, you’re painting a small batch for personal use, or you just enjoy experimenting on the bench
- Buying pre-finished makes sense when you need consistent durability across dozens of identical blades, or you don’t have time to build out a paint station
This is exactly where High Class Tackle Co.'s pre-finished blade packs earn their keep. You get pro-grade durability and consistent color runs without buying primer, paint, a respirator, and a heat gun just to try one pattern. If you’re weighing the time you’d sink into a dozen hand-painted blades against the cost of a finished pack, the math often favors buying once you’re past the experimentation stage and just need blades that fish.
Field Notes From the Bench
Test one blade before committing to a full batch. Colors and coatings behave differently once they’re wet, and a single trial run saves you from repainting a dozen blades.
Keep a set of scrap blades around strictly for heat and paint tests, and label every color mix you create. You will not remember that exact chartreuse-to-orange ratio three months from now. Bevel every edge, check spin after each clear coat, and separate painted blades with tissue in storage. These are small habits, but they’re the difference between a box of blades that fish well and one that needs constant rework.
Want Pro-Grade Finishes Without the Bench Work?
If reading through primer coats, cure windows, and powder timing has you leaning toward buying instead of building, you’re not alone. Plenty of anglers love the process, and plenty just want blades that spin true and hold color all season. High Class Tackle Co. built its blade packs for that second group, giving you consistent, durable finishes without the cost of a respirator, an airbrush setup, and a shelf of solvents you’ll use twice a year.

Browse High Class Tackle Co.'s tackle and blade lineup for pre-finished options built for salmon and steelhead water, or check the terminal tackle and components collection if you’re assembling your own rigs around them. Once your blades are dialed in, a splash of Pro-Cure scent on the rig rounds out the presentation. Head to the shop, pick your blade pack, and get it rigged before your next trip on the water.
Frequently Asked Questions
What’s the best paint for spinner blades? For airbrush work, Createx is a favorite for its low odor and easy cleanup, while One Shot gives richer color but needs stronger ventilation. For quick jobs, Sally Hansen nail polish works well sealed under a clear topcoat.
Do I need to remove the factory finish before painting? Yes, on plated or lacquered brass blades. Sand or use thinner to strip that factory coating first, then clean with acetone so your primer has raw metal to bite into.
How do I keep painted blades spinning correctly? Keep paint off the hole, bevel every edge, and test spin after each coat of paint or clear. Excess coating weight is the most common cause of a sluggish or wobbly blade.
How long should I let a blade cure before fishing it? Most solvent paints and clearcoats need 24 to 72 hours for full cure. Powder finishes cool quickly, but always let any finish fully harden before stacking blades together.
Is powder painting worth the extra equipment for a hobbyist? If you’re painting a handful of blades occasionally, spray or airbrush gets you most of the durability without the learning curve. Powder painting pays off once you’re producing batches or want the toughest finish possible.
Sources
- Powder Painting Spinner Blades and Spoons
- Airbrush For Painting Spinner Blade Question | IFish Fishing Forum
- Painting Spinner Blades - Wire Baits
- Painting spinner blades - Walleye Message Central
Recommended
- Why Spinner Blades Are a Game-Changer – High Class Tackle Co.®
- Spinner Blades: The Ultimate Hack for Reeling in More Salmon – High Class Tackle Co.®
- Custom Spinner Blades for Salmon and Steelhead Success – High Class Tackle Co.®
- Northwild Blades: the Angler’s Guide to Spinner Performance – High Class Tackle Co.®
0 comments