

The two rigs that catch salmon from the bank, no matter what, are the three-way dropper rig and the sliding leader rig. Spool up with braided line suitable for heavy tackle, run a leader of moderate strength, and match your sinker weight to the current strength with appropriate lead weights. Get those numbers dialed in and you’re ready to tie on, cast out, and let the river do the rest. Below, we break down exactly how to build both rigs, choose your tackle, and put your bait in the strike zone.
TL;DR:
- The three-way dropper rig is preferred in heavy currents and for quick, simple setups, while sliding rigs suit diving plugs and stealthy casting situations.
- Use a long, strong rod with high-capacity braid and a matching reel to handle heavy sinkers and fight salmon in strong currents effectively.
- Cast into the current seam close to bank features like bends or bottlenecks, and use heavier sinkers—up to 12 ounces—or more for deep or fast flows.
- Balance leader strength lighter than mainline to prevent losing the entire rig on snags, and check bait every 15–20 minutes to maintain scent and texture.
- Regularly rinse and maintain terminal tackle to prevent corrosion and replace rusty or deformed hardware, ensuring consistent performance.
Table of Contents
- Three-Way Dropper Rig Vs. Sliding Rig: Which One Do You Tie?
- What Rod, Reel, and Line Belong on a Plunking Setup?
- How Do You Rig and Cast a Plunking Setup?
- Where Should You Cast a Plunking Rig?
- Detecting Bites and Protecting Your Rig From Snags
- Field Notes From Nick On Dialing In Your Plunking Rig
- Staying Safe and Legal While Plunking From the Bank
- Common Mistakes That Cost Anglers Fish and Tackle
- Cleaning and Storing Your Plunking Rigs After a Trip
- Why Plunking Still Earns a Spot in Every Angler’s Rotation
- Where to Get Your Plunking Tackle Sorted in One Stop
- Sources
- FAQ
Three-Way Dropper Rig Vs. Sliding Rig: Which One Do You Tie?
The three-way swivel rig is the workhorse of salmon plunking rigs, and for good reason. You run your mainline to one eye of a three-way swivel, tie a short dropper line to a second eye for your sinker, and run a longer leader off the third eye to your hook or lure. That short dropper takes the abuse from rocks and current, while your leader keeps the bait or blade swimming naturally in the flow.
The sliding rig works differently. Instead of a fixed leader off a swivel, your lure or plug rides on a snap link that slides freely down the mainline until it reaches the weight. Beads act as stoppers, cushioning the knot and keeping the rig from jamming up on the cast.
Here’s how to pick between them:
- Heavy current, bait or blade presentations: go three-way. It holds bottom better and keeps bait scent working in one spot.
- Diving plugs like Mag Lips or Flatfish: go sliding. The sliding sinker setup lets the plug wobble freely without a fixed leader fighting its action.
- Tangle-prone casting spots: sliding rigs cut down on the line twist that plagues three-way setups on long, aggressive casts.
- Simple bait soak, minimal fuss: three-way rigs are faster to tie streamside and easier to troubleshoot when something goes wrong.
Most anglers who plunk regularly carry both pre-tied. Conditions change fast on a falling tide, and swapping rig styles beats standing on the bank re-rigging from scratch.
What Rod, Reel, and Line Belong on a Plunking Setup?
Plunking rewards the right hardware more than almost any other salmon technique, because you’re casting heavy weight and holding position against real current for hours at a time.
- Rod: Pick a long bank rod with a strong backbone, typically in the longer range for leverage and casting heavy sinkers. Length and backbone do double duty here. They load up to launch heavy sinkers past the near-shore slack water, and they give you leverage when a chinook decides to run downstream on you. Shorter boat rods built for trolling rigs simply don’t have the lift.
- Reel: Use a spinning reel of a moderate to larger size, or an equivalent baitcaster, that can hold enough line for plunking. Look for enough line capacity to hold your braid plus backing without spooling too thin.
- Mainline: Braided line strong enough to cast and fight salmon in current is the standard, since thinner-diameter braid cuts drag in current and telegraphs bites faster than mono. If you prefer mono, step up to 25 to 30 pound test.
- Leader: Run a lighter leader of monofilament or fluorocarbon suitable for water conditions. Clear water calls for the lighter, less visible end of that range.
- Sinkers: Pyramid or teardrop shapes hold bottom in current far better than round sinkers, which tend to roll and drag downstream.
- Terminal gear: Stock a three-way swivel, a duo-lock or snap link, a few beads, Spin-N-Glo or blade options, and hooks in the 1/0 to 4/0 range depending on target species.
Pro Tip: Keep your leader lighter than your mainline on purpose. If you snag bottom, you want the leader to break, not your $15 spool of braid.
How Do You Rig and Cast a Plunking Setup?
Getting the salmon plunking setup right takes about five minutes once you’ve done it a few times. Here’s the order of operations for both rigs.
Three-way rig assembly:
- Tie your mainline to one eye of the three-way swivel with a solid knot like an improved clinch.
- Attach an 8 to 20 inch dropper line to the second eye, then clip on your pyramid sinker.
- Tie a 24 to 36 inch leader to the third eye, then add your hook, blade, or bait rig.
- Thread bait onto the hook using an egg loop or baitholder wrap so it stays secure through the cast.
Sliding rig assembly:
- Thread one or two beads onto your mainline to act as stoppers.
- Tie on a snap link below the beads, then attach your leader and lure.
- Tie your sinker directly to the terminal end of the mainline, or use a separate dropper depending on your plug’s diving depth.
- Let the snap link and lure slide down against the beads before casting.
Cast underhand with a smooth lob rather than a hard overhead throw. This keeps the rig from tangling mid-air. Once it lands, set your rod in a holder at roughly a 45 degree angle and tighten your drag just enough to hold position without slipping. If you snag on the first cast, check that your sinker size matches the current before assuming it’s the spot.
Where Should You Cast a Plunking Rig?
Salmon migrating upstream hug the path of least resistance, and that’s exactly where your rig needs to land. Inside seams, current bends, bottlenecks, and the edges of gravel bars all funnel fish close enough to reach from the bank.
- Light current, shallow water: 1 to 3 ounces of lead is usually enough to hold bottom without dragging.
- Moderate flow: step up to 4 to 8 ounces.
- Heavy flow or deep runs: go 8 to 12 ounces, occasionally more from a boat or kayak according to Sportfishing Buddy’s rigging breakdown.
- Small rivers: cast just past the seam and let the rig settle into the slower inside water.
- Large rivers or beaches: cast further out toward the defined current line where fish are actually traveling, since strong flows and outgoing tides push migrating salmon closer to structure.
Watch how other bank anglers are positioned. A crowded stretch of bank on a weekday usually means someone found the lane.
Detecting Bites and Protecting Your Rig From Snags
Set your rod tip around 45 degrees. That angle keeps slack out of the line without creating so much tension that current alone triggers false bites. A rod holder with an adjustable angle or a simple sand spike both work fine for this.
A real bite usually shows up as a distinct tap-tap or a slow, steady bend rather than the rhythmic throb of current pressure. Resist the urge to set the hook the instant you see movement. Give the fish a second to load the rod, then sweep back firmly.
Snags happen. That’s why your dropper or leader should always test lighter than your mainline. When you do hang up, point your rod straight at the snag and pull steadily. You’ll lose the sinker, not the whole rig.
Pro Tip: Carry pre-tied droppers in a small tackle box so you can re-rig in under a minute after a snag instead of losing fishing time to knot-tying.
Field Notes From Nick On Dialing In Your Plunking Rig
In Pacific Northwest current, I lean on 50 pound braid paired with a 15 pound fluorocarbon leader almost every time out. The braid keeps hooksets sharp with zero stretch, and fluorocarbon disappears near rocky bottom where salmon get line shy.
I switch to a sliding rig the moment I want a diving plug in the mix, especially on rivers where plug presentations already prove themselves in current. For bait, wrap sand shrimp or eggs tight with thread so current doesn’t strip them off on the first cast. Always check your local regulations before you wet a line, and handle every fish you plan to release quickly and gently.
Staying Safe and Legal While Plunking From the Bank
Plunking puts you standing at the water’s edge for hours, often on wet rocks or unstable gravel, so footing matters as much as your rig does. Wear boots with real traction, and scout your spot in daylight before you try it at dawn or dusk.
River levels shift fast, especially below dams or during snowmelt season, so keep an eye on the water and move if it starts climbing around your feet. Never wade out to free a snagged rig in current you wouldn’t wade across on a normal day.
Regulations vary significantly by state, river, and even specific stretches of the same river. Daily limits, gear restrictions, and open seasons for salmon change year to year, and some stretches ban bait or treble hooks entirely during certain windows. Check your state fish and wildlife department’s current regulations before every trip, not just once a season, since emergency closures happen when runs come in weak. Carry your license and any required catch record card, and know the difference between hatchery and wild fish in your specific water since release rules often differ.
Respect other anglers’ space along the bank. Plunking rigs sit stationary for long stretches, and crowding someone’s water is both bad etiquette and a good way to end up with tangled lines.
Common Mistakes That Cost Anglers Fish and Tackle
The single biggest mistake is using a sinker too light for the current. An undersized weight drags downstream, drags your bait out of the strike zone, and makes every current bump feel like a bite. Go heavier than you think you need, then adjust down if you’re not moving at all.
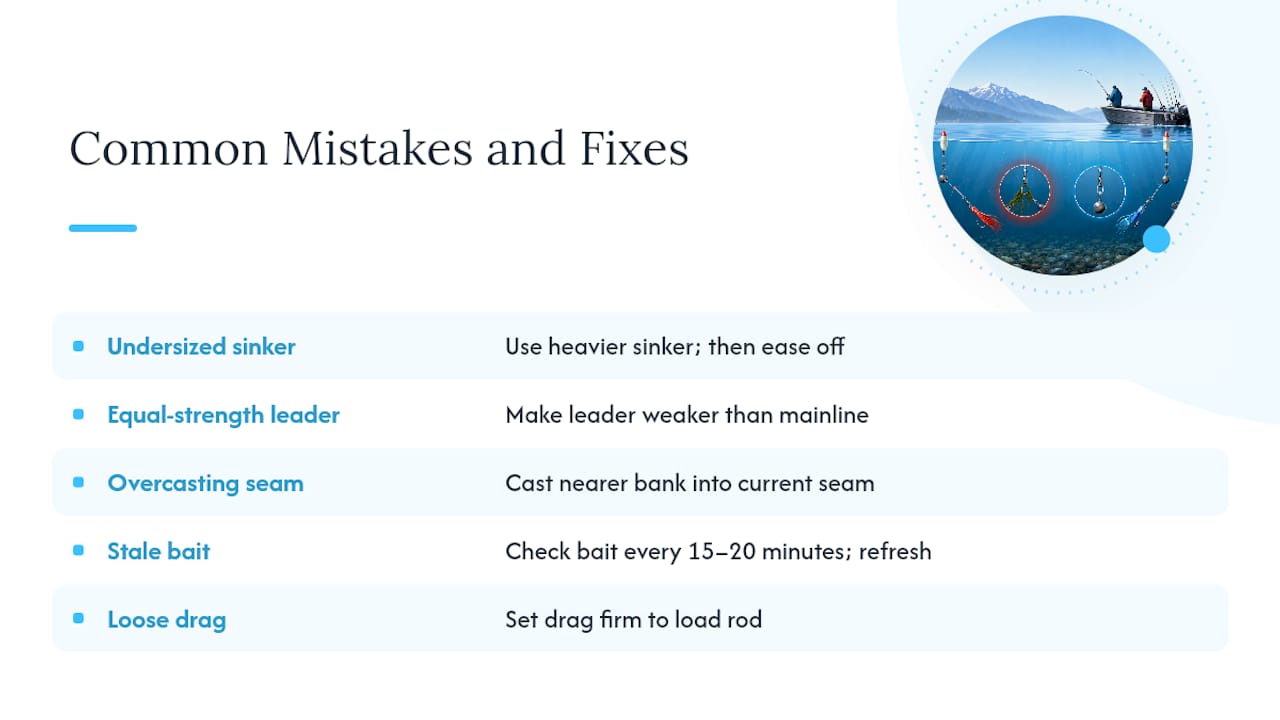
Tying the leader the same test as the mainline is the second most common error. When that happens, a snag costs you the entire rig instead of just the sinker. Keep that weak link in the chain on purpose.
Casting too far past the seam wastes time and effort. Salmon travel the path of least current resistance, which is usually closer to the bank than most anglers assume. Overcasting puts your bait in dead water where fish rarely swim.
Letting bait sit too long without checking it ranks high on the list too. Current and small fish strip scent and texture off bait fast. Check your presentation every 15 to 20 minutes and refresh it before it goes lifeless.
Finally, loose drag settings lose fish that would otherwise be landed easily. Too loose, and a hard-charging chinook peels line before you even reach the rod. Set your drag firm enough to load the rod on a hookset, then adjust once the fight is underway.
Cleaning and Storing Your Plunking Rigs After a Trip
Salt, sand, and fish slime break down terminal tackle faster than most anglers realize, even on freshwater trips where mineral content in river water still corrodes hooks and swivels over time.
Rinse every rig with fresh water before it goes back in the tackle box, and dry hooks completely before storage since trapped moisture rusts points and barbs within days. Wipe down swivels and snap links, checking that they still rotate freely and haven’t developed grit inside the joint.
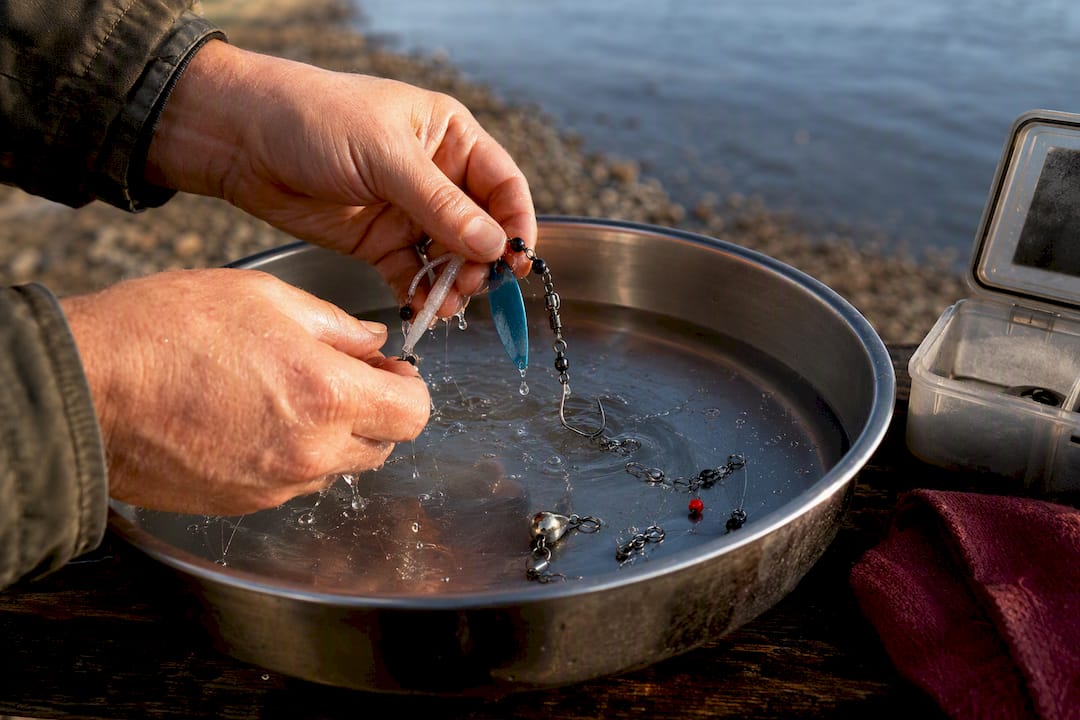
Store pre-tied droppers and leaders on foam leader wraps or in labeled bags by test strength, so you’re not untangling a rat’s nest of line at the river next time. Replace any hook that shows even light rust rather than trying to sharpen it back into shape, since corrosion weakens the metal below the surface you can see.
Check your sinkers for flat spots or nicks from bouncing bottom, and retire any that have deformed enough to roll instead of hold. A little tackle maintenance between trips saves real money over a season, and it means you’re rigging fresh gear instead of fighting corroded hardware when the bite turns on.
Why Plunking Still Earns a Spot in Every Angler’s Rotation
Plunking rewards patience over technique, and that’s exactly why it works when heavy flows shut down other methods. It’s social, low effort, and deadly during high water when migrating fish hug the bank. Build it into your seasonal rotation rather than your only tactic, and you’ll cover conditions other methods can’t touch. The gear is built around simple, angler-first thinking.
— Nick
Where to Get Your Plunking Tackle Sorted in One Stop
Building salmon plunking rigs from scratch means hunting down swivels, snaps, beads, and hooks from a handful of different sources, which eats into fishing time you’d rather spend at the river. Terminal gear needed for bank fishing is available in one place, sized and tested for this type of use.

Our terminal tackle and components collection covers the hooks, swivels, snaps, and beads that go into both the three-way and sliding rig, so you’re not guessing which parts fit together. If you’re fishing bigger water with heavier current, the Hanford Reach collection leans toward the beefier hardware that big-river plunking demands. Browse either collection now and get your tackle box stocked before your next trip to the bank.
Sources
For deeper reading on rig dimensions and setup variations, see the breakdowns from Lake Ontario Outdoors, Trout & Steelhead, Sportfishing Buddy, and Fish Whatcom.
- Salmon rigs - Sportfishing Buddy
- Plunking for salmon - Lake Ontario Outdoors
- Plunking For Salmon: The 2 Best Setups And Baits - Trout & Steelhead
FAQ
How do you set up a plunking rig for salmon?
Tie your mainline to a three-way swivel, add an 8 to 20 inch dropper with a pyramid sinker, then run a 24 to 36 inch leader to your hook or lure off the third eye.
What is the best rig for catching salmon while plunking?
The three-way swivel rig is the most versatile choice for bait and blades, while a sliding rig works better for diving plugs like Mag Lips that need freedom to swim.
How do you plunk for salmon from the bank?
Cast your rigged setup into a migration lane near a current seam or bar edge, set your rod in a holder at roughly 45 degrees, and let the current hold your bait or lure in the strike zone until a fish finds it.
What is the best fishing setup for chinook salmon when plunking?
Pair 40 to 65 pound braid with a 12 to 20 pound leader, a three-way swivel, and hooks in the 2/0 to 4/0 range, adjusting sinker weight from 4 to 12 ounces based on current strength.
0 comments