

The ultimate shrimp cure is defined as a controlled acid or salt-based process that firms shrimp texture, intensifies flavor, and boosts bait attractiveness for fishing or culinary use. Whether you’re rigging bait for Pacific Northwest salmon or prepping shrimp for ceviche, the same core principles apply: quality ingredients, precise timing, and cold temperature control. Products like Pro-Cure Ultimate Shrimp Cure have made this process faster and more consistent for both anglers and home cooks. Master this method and you’ll notice the difference on the water and at the table.
What ingredients and tools do you need for the ultimate shrimp cure?
The right setup before you start curing makes the difference between firm, vibrant shrimp and a mushy mess. Here’s what you need, broken down by category.
Essential ingredients:
- Pro-Cure Ultimate Shrimp Cure powder or liquid (the top-performing commercial cure for texture and color enhancement)
- Fresh lime juice (for natural acid curing or ceviche-style preparation)
- Kosher salt (coarser grain dissolves more evenly than table salt)
- Sugar (balances acidity and helps draw moisture from the shrimp)
- Optional: food-safe dye for bait visibility in murky water
- Optional: probiotic additives for aquaculture-focused curing applications
Recommended tools:
- Glass, ceramic, or stainless steel bowls. Aluminum or copper bowls react with acid in lime juice and produce a metallic off-flavor that ruins the cure.
- Food-safe gloves to protect your hands from prolonged acid exposure
- A refrigerator or cooler capable of holding below 40°F during the curing process
- Sharp kitchen shears or a fillet knife for sizing shrimp consistently
- Airtight containers or zip-lock bags for storage after curing
Shrimp sourcing matters more than most people realize. Flash-frozen shrimp is often safer and better for curing than “fresh” shrimp sitting in grocery store display cases. The freezing process kills parasites and preserves texture, giving you a cleaner starting point for any cure method.
| Tool or Ingredient | Why It Matters |
|---|---|
| Glass or stainless steel bowl | Prevents acid-metal reaction and off-flavors |
| Pro-Cure Ultimate Shrimp Cure | Consistent texture, color, and scent enhancement |
| Flash-frozen shrimp | Safer for raw curing; parasite risk reduced |
| Kosher salt | Even dissolution for uniform cure penetration |
| Refrigeration below 40°F | Stops bacterial growth during the curing window |
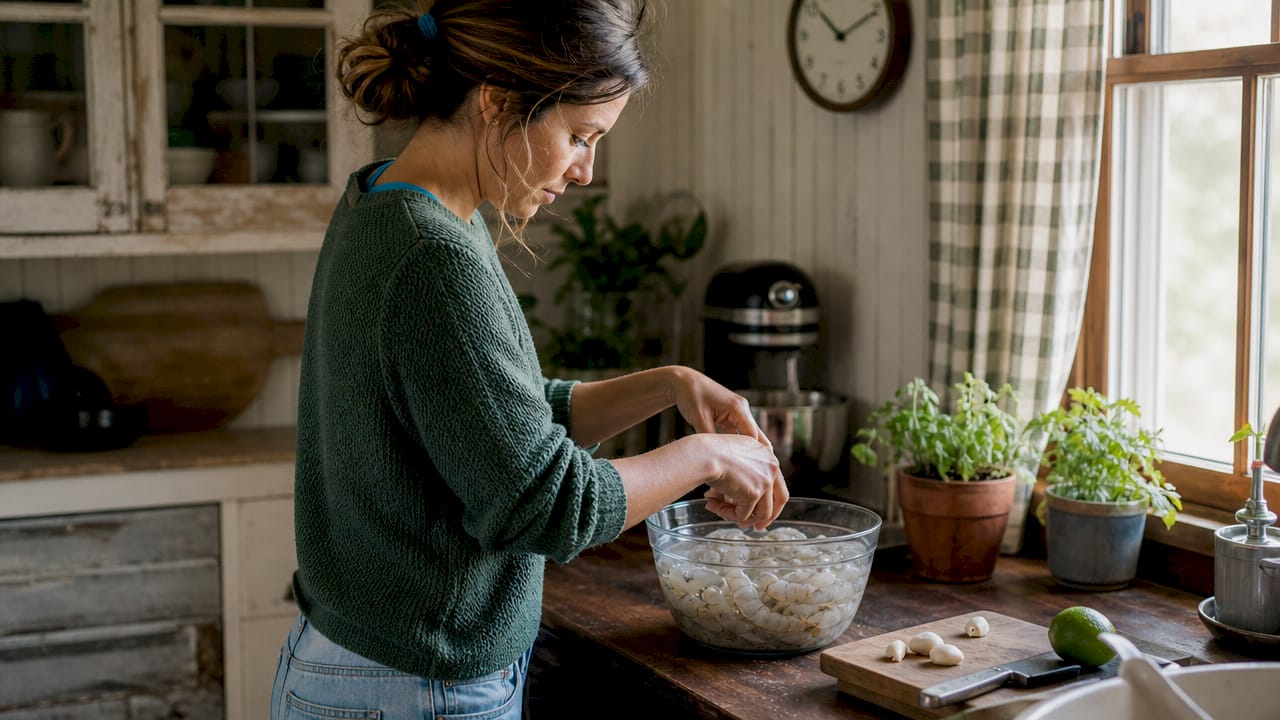
Pro Tip: Buy shrimp frozen and thaw them yourself the night before. You control the thaw temperature, which means you control the safety window before curing begins.
How do you properly cure shrimp step by step?
The curing process works through protein denaturation. Acid from lime juice or a commercial cure like Pro-Cure changes the protein structure of shrimp, firming the flesh and altering its appearance. Here’s the exact process for both bait and culinary applications.
-
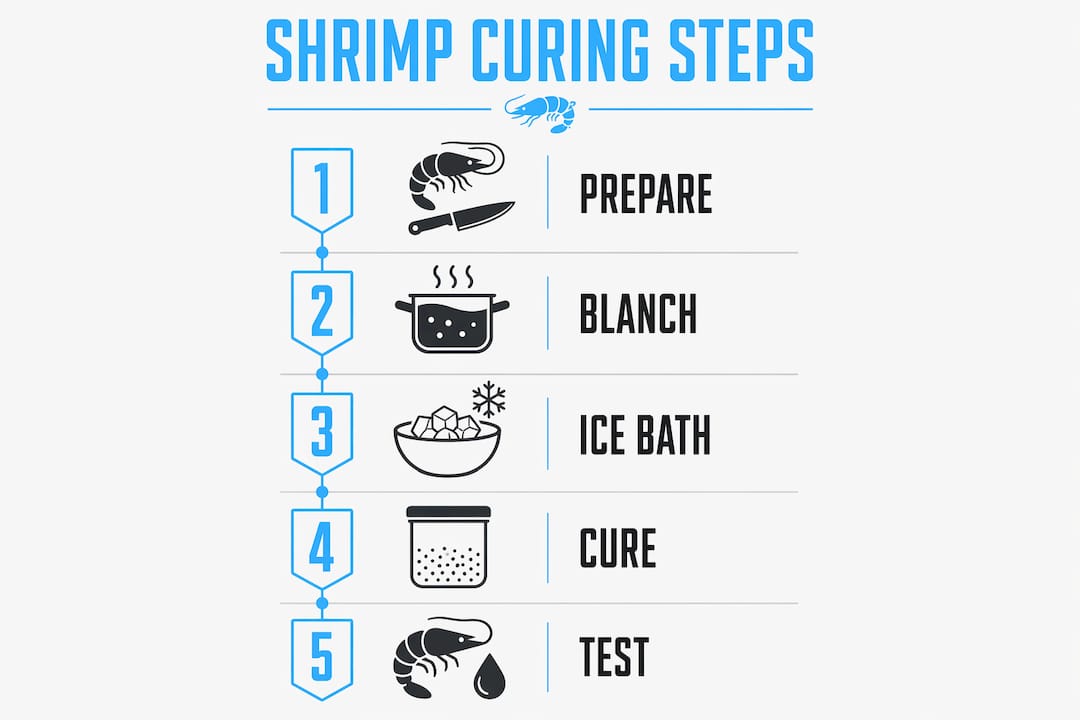
Clean and prep your shrimp. Peel, devein, and rinse under cold water. For bait, you can leave tails on for easier rigging. For culinary use, cut shrimp into bite-sized pieces to speed up cure penetration.
-
Choose your cure method. For a natural acid cure, use fresh lime juice. For maximum scent and color for fishing bait, use Pro-Cure Ultimate Shrimp Cure. Both methods work, but commercial cures give you more control over the final result.
-
Submerge shrimp completely. Every piece must be fully covered by the curing liquid. Uneven submersion creates uneven texture, with some shrimp over-cured and others still raw in the center.
-
Time it precisely. Shrimp take 15 to 60 minutes to cure in lime juice. Fifteen to thirty minutes produces a medium cure with a slightly translucent center. Forty-five to sixty minutes produces a firm, fully opaque texture. Never exceed two hours or the proteins break down into a chalky, mushy result.
-
Keep it cold throughout. Place your curing bowl in the refrigerator or set it over an ice bath. Cold temperature below 40°F is non-negotiable for food safety during raw curing.
-
Check texture and color. Properly cured shrimp turn pink and opaque on the outside. Press one gently. It should feel firm but not rubbery.
-
Drain and store. Remove shrimp from the cure, pat dry, and transfer to an airtight container. Refrigerate immediately and use within 24 to 48 hours for best results.
For a safer hybrid method, blanch shrimp briefly in boiling water for 60 to 90 seconds, transfer to an ice bath, then apply the lime or commercial cure for 15 to 30 minutes. This method reduces bacterial risk without creating a rubbery texture, and it’s the smarter move when you’re serving shrimp to guests or kids.
Pro Tip: Smaller shrimp cure faster. If you’re using jumbo prawns for bait, cut them in half lengthwise before curing. You’ll get faster, more even penetration and a better scent trail in the water.
What common mistakes should you avoid when curing shrimp?
Most curing failures come down to a handful of repeatable errors. Knowing them upfront saves you from wasting good shrimp.
-
Over-curing is the most common mistake. Leaving shrimp beyond one hour in lime juice causes over-denaturation. The result is tough, chalky shrimp with moisture loss that makes them useless for both bait and eating.
-
Using reactive metal bowls. Aluminum and copper react with citric acid. The chemical reaction produces metallic compounds that leach into your shrimp and ruin the flavor. Always use glass, ceramic, or stainless steel.
-
Insufficient submersion. If shrimp are stacked or crowded, the top layer won’t cure properly. Use a large enough bowl and stir once or twice during the process to keep everything coated.
-
Adding salt too early in a lime cure. Salt draws moisture out of shrimp rapidly. If you add it at the start of a lime cure, you’ll get a drier, tougher texture than intended. Add salt after the acid cure is complete, or use a commercial cure that balances the timing for you.
-
Ignoring shrimp quality. Starting with low-quality or improperly stored shrimp produces a bad cure every time. No amount of Pro-Cure or lime juice fixes shrimp that smells off before you start.
“Acid curing changes the texture of shrimp, but it does not kill all bacteria or parasites. Proper refrigeration and high-quality sourcing are the real safety controls.” — TheChefsToday
To test shrimp readiness, press the thickest piece between two fingers. It should spring back slightly and feel firm without being rubbery. Visually, the exterior should be fully pink and opaque. If the center still looks glassy or translucent after 30 minutes, give it another 10 minutes and check again.
How does shrimp curing connect to disease prevention?
Shrimp disease prevention is a real concern for anglers using live or cured bait, and for anyone sourcing shrimp from aquaculture operations. Understanding the pathogen risks makes you a smarter buyer and a safer handler.
Vibrio bacteria, particularly Vibrio parahaemolyticus, are the primary pathogen risk in raw shrimp. They thrive at room temperature and in improperly handled seafood. Keeping shrimp below 40°F during curing and storage is the most direct control you have as an angler or home cook.
In commercial aquaculture, probiotics like Pediococcus acidilactici are added to pond water to improve shrimp immunity and water quality. This approach reduces reliance on chemical treatments and improves disease resistance against Vibrio strains. For anglers sourcing bait shrimp from aquaculture farms like Halemalu Farms, understanding these practices tells you a lot about the health and safety of the product you’re handling.
| Pathogen or Risk | Control Method | Relevance to Anglers |
|---|---|---|
| Vibrio parahaemolyticus | Keep below 40°F; use frozen shrimp | Reduces risk when handling bait |
| Parasite transmission | Flash-freeze before curing | Kills parasites in raw shrimp |
| Bacterial growth in cure | Refrigerate throughout process | Prevents spoilage during curing window |
| Aquaculture disease spread | Probiotic water management | Affects bait shrimp health at source |
Pro Tip: When buying bait shrimp, ask if they were flash-frozen at the source. Shrimp that went straight from harvest to your bait bucket without freezing carry a higher pathogen load, which matters if you’re handling them with cuts or abrasions on your hands.
How do you choose between the ultimate shrimp cure and alternatives?
Not every curing agent works the same way for every application. Here’s how the top options compare for anglers and cooks.
Pro-Cure Ultimate Shrimp Cure is the easiest cure to use for both fishing and culinary preparation. It combines scent attractants, color enhancement, and texture firming in one product. Seasoned anglers targeting Pacific salmon and steelhead consistently report stronger bait performance with Pro-Cure compared to plain salt or lime-only methods.
Fresh lime juice is the natural alternative. It’s accessible, inexpensive, and produces excellent results for culinary curing. The drawback for fishing use is that it adds no scent attractant and the color change is subtle. It’s the right call for ceviche and cooking prep, but it’s not optimized for bait.
Pro-Cure also offers the Fire Ball Red shrimp cure, a variant with a distinctive red color and scent profile that performs well in murky or stained water. The bright color increases bait visibility when light penetration is low, which is a real advantage on Pacific Northwest rivers after rain.
| Curing Agent | Best Use | Scent Attractant | Ease of Use | Cost |
|---|---|---|---|---|
| Pro-Cure Ultimate Shrimp Cure | Fishing bait and culinary | Yes | Very easy | Moderate |
| Fresh lime juice | Culinary (ceviche) | No | Easy | Low |
| Pro-Cure Fire Ball Red | Murky water fishing | Yes, strong | Very easy | Moderate |
| Salt-only cure | Quick bait prep | Minimal | Easy | Very low |
For anglers who want to explore beyond these options, Highclasstackleco has a full breakdown of top cure alternatives worth reading before your next trip.
Key takeaways
The most effective shrimp cure combines precise timing, cold temperature control, and the right curing agent for your specific use, whether that’s fishing bait or culinary preparation.
| Point | Details |
|---|---|
| Timing is everything | Cure shrimp 15 to 30 minutes for medium texture; never exceed 60 minutes to avoid chalky results. |
| Use the right bowl | Glass or stainless steel only; aluminum and copper react with acid and ruin flavor. |
| Start with frozen shrimp | Flash-frozen shrimp reduces parasite risk and produces a cleaner, firmer cure. |
| Match the cure to the use | Pro-Cure Ultimate Shrimp Cure for bait; lime juice for culinary; Fire Ball Red for murky water. |
| Cold temperature is non-negotiable | Keep shrimp below 40°F throughout the entire curing process to prevent bacterial growth. |
What I’ve learned from years of curing shrimp on the water
Every angler eventually develops a feel for this process, and mine came from a lot of trial and error on Pacific Northwest rivers.
The biggest lesson: shrimp size changes everything. A jumbo prawn needs twice the cure time of a medium shrimp, and if you treat them the same, you’ll end up with one over-cured and one still raw in the middle. I now cut larger shrimp before curing every single time, and my bait consistency improved immediately.
The hybrid blanch-then-cure method is underrated for anyone who’s nervous about raw curing. You get the safety of a brief heat treatment without the rubbery texture of fully cooked shrimp. For family fishing trips where kids are handling bait, it’s the smarter call.
The one thing most guides won’t tell you: the quality of your cure matters less than the quality of your shrimp. I’ve seen anglers spend money on premium cures and then start with shrimp that were already borderline. The cure can’t fix bad sourcing. Buy frozen, thaw it yourself, and your results will be dramatically better regardless of which cure you use.
Experiment with timing and cut size. Respect the cold temperature rule. And don’t skip the bowl material check. Those three things alone will put you ahead of 90% of anglers curing their own bait.
— Nick
Gear up with Highclasstackleco for your next shrimp cure
If you’re ready to put this into practice, Highclasstackleco has everything you need in one place.

The Pro-Cure Ultimate Shrimp Cure is stocked and ready to ship, and it’s the same product trusted by serious West Coast anglers targeting salmon and steelhead. Whether you’re curing bait for a big river run or prepping shrimp for the grill, this cure delivers consistent results every time. Head over to Highclasstackleco to browse the full lineup of cures, terminal gear, and tackle built for real fishing conditions. We build for anglers who take their time on the water seriously.
FAQ
What is the ultimate shrimp cure used for?
The ultimate shrimp cure is used to firm shrimp texture, enhance color, and boost scent for fishing bait or improve flavor for culinary preparation. Products like Pro-Cure Ultimate Shrimp Cure serve both purposes effectively.
How long should you cure shrimp in lime juice?
Cure shrimp in lime juice for 15 to 30 minutes for a medium texture, or 45 to 60 minutes for a firm result. Never exceed two hours, as over-curing breaks down proteins and creates a chalky, mushy texture.
Is acid curing the same as cooking shrimp?
No. Acid curing changes the protein structure of shrimp but does not kill all bacteria or parasites. Keeping shrimp below 40°F and starting with flash-frozen shrimp are the critical safety controls.
What bowl should you use when curing shrimp?
Use glass, ceramic, or stainless steel bowls only. Aluminum and copper react with citric acid and produce metallic off-flavors that ruin both the taste and the cure quality.
Which shrimp cure works best for salmon fishing?
Pro-Cure Ultimate Shrimp Cure is the top choice for salmon and steelhead fishing due to its scent attractants and color enhancement. Pro-Cure Fire Ball Red is the stronger option for murky or stained water conditions.
0 comments